Integration
Within our platform, Integration is a remarkable feature that empowers you to establish connections between your chatbot and external services, including third-party APIs. This integration serves various purposes, such as augmenting your chatbot`s capabilities with new features, enabling data retrieval or storage, and facilitating real-world actions.
Third-party APIs are software interfaces that offer specialized functionality, designed to be utilized by other software applications. For instance, there are APIs available for sending emails, SMS messages, fetching weather information, and more.
By incorporating third-party APIs into our platform, you can greatly enhance your chatbot`s potential, making it more robust and adaptable. For instance, you can seamlessly integrate with a payment API to enable users to make payments directly within your chatbot.
There are four integration segment in our platform. We will learn each segment one by one. They are:
- SMS
- Responder
- E-Commerce
In our platform, Email integration offers you the capability to establish connections between your chatbot and external email service providers (ESPs), such as SMTP (Simple Mail Transfer Protocol), Mailgun, or Postmark. This integration empowers your chatbot to send and receive emails, providing a wide range of functionalities, including:
- Sending welcome emails to new subscribers.
- Dispatching notification emails when users engage in specific actions, such as registering for a service or making a purchase.
- Distributing abandoned cart emails to users who have added items to their cart but have not yet completed the purchase.
- Initiating automated email sequences aimed at nurturing leads and transforming them into customers.
- Delivering support emails to users who have submitted tickets or contacted customer support.
By leveraging our platform`s Email integration, you can effectively harness the power of email communication to engage users and enhance their experience, while also streamlining various aspects of your business operations.
To integrate an email service provider, you can follow these steps:

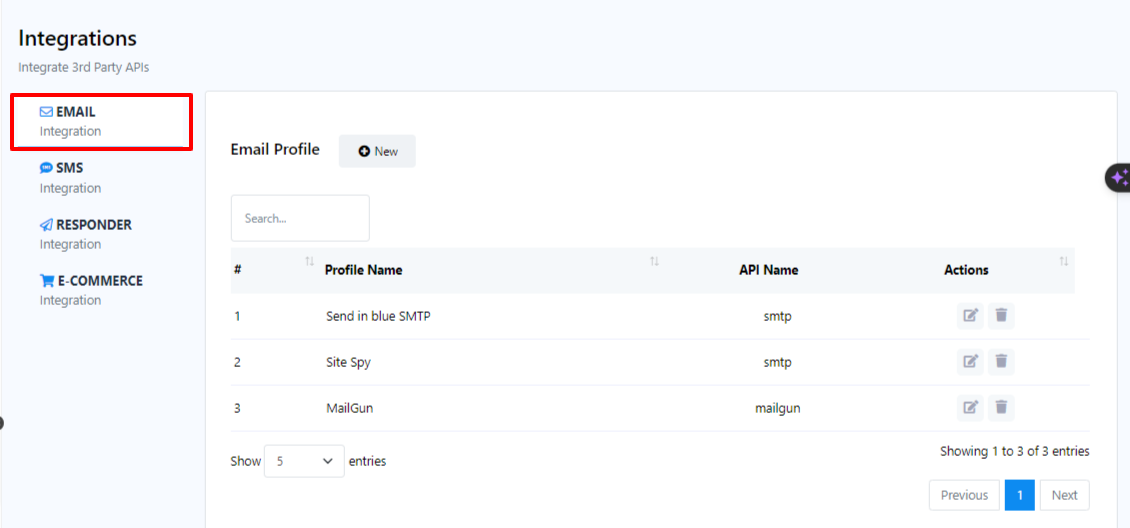
- Begin by accessing your Dashboard, and then scroll down to the `Management` section.
- Locate and click on the `Integration` option.
- Within the Integration menu, click on the `Email` category.
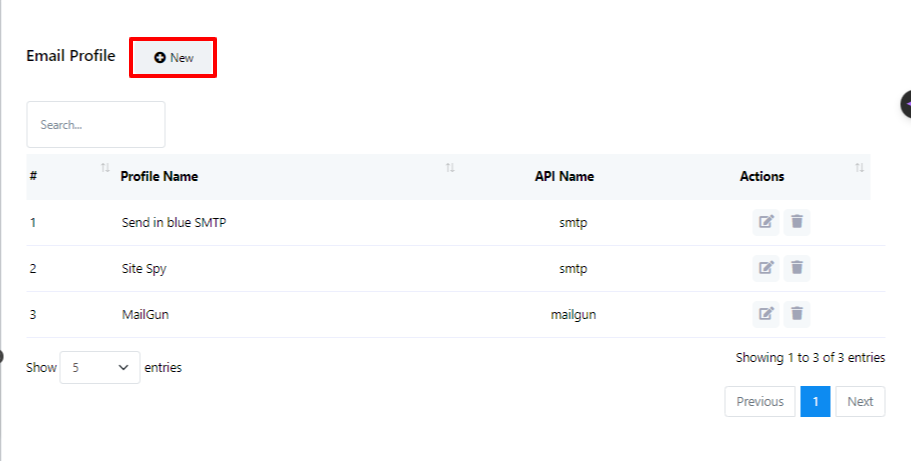
- To set up a new email service provider profile, click on the `New` button next to Email Profile.
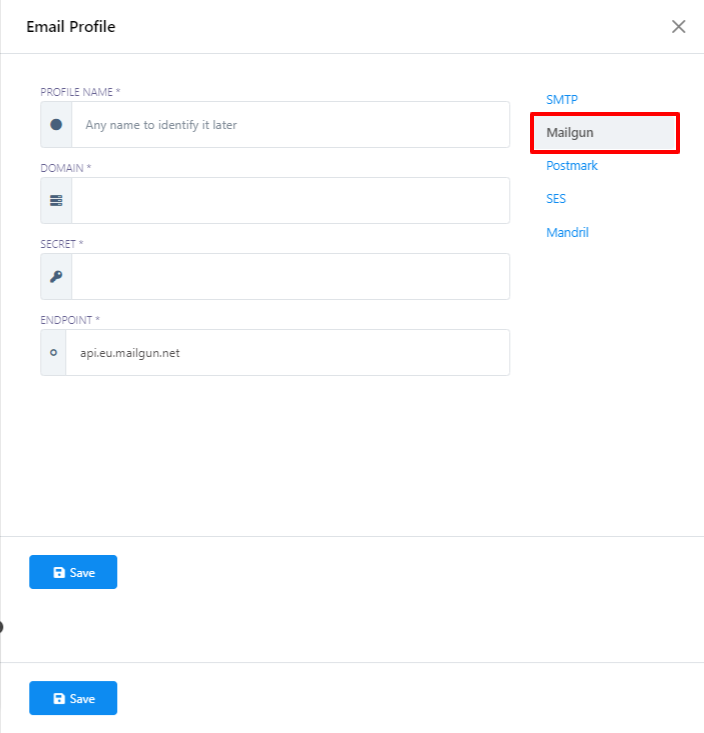
- For the purpose of this guide, we will demonstrate the process using Mailgun as the chosen Email Service Provider. Therefore, click on the `Mailgun` option.
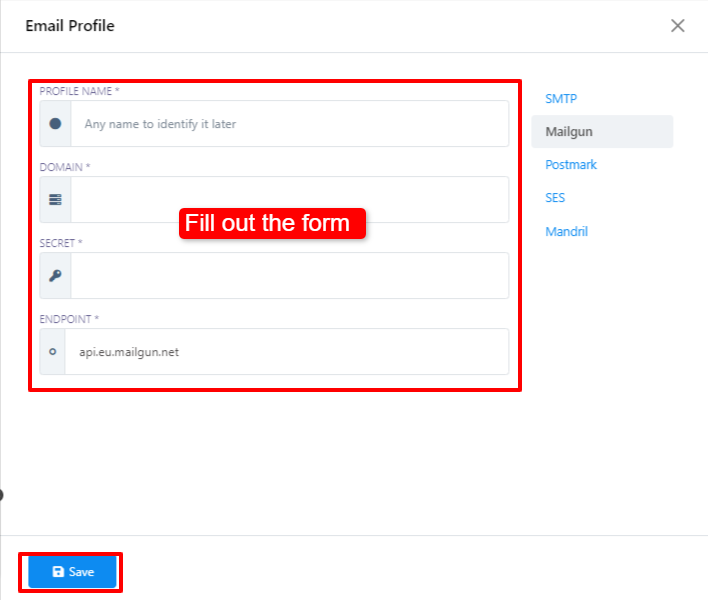
- Now, proceed to complete the form to create your Mailgun profile. The necessary information for filling out this form can be found in your Mailgun account.
- After you have filled out the required information, click on the `Save` button to finalize the setup of your Mailgun profile.
By following these steps, your Mailgun email service provider integration will be successfully established.
SMS
SMS integration in our platfrom refers to the incorporation of SMS (Short Message Service) functionality into our chatbot system. It allows our chatbots to send and receive text messages, enabling businesses to engage with their customers through SMS channels. This integration can be used for various purposes, such as:
Providing customer support: Chatbots can answer common customer questions, provide order updates, and resolve issues via SMS.
Sending notifications: Chatbots can send notifications about new products, promotions, and upcoming events.
Conducting surveys: Chatbots can collect customer feedback and survey data via SMS.
Facilitating transactions: Chatbots can process payments and complete purchases via SMS.
Here are some specific examples of how businesses can use SMS integration in our platform:
- A retail store could use SMS integration to send customers notifications about new arrivals, sales, and back-in-stock alerts.
- A restaurant could use SMS integration to allow customers to place orders, make reservations, and receive order updates.
- A travel company could use SMS integration to send customers flight status updates, boarding passes, and itinerary reminders.
- A financial services company could use SMS integration to send customers account alerts, transaction notifications, and customer support assistance.
To integrate a SMS service provider, you can follow these steps:
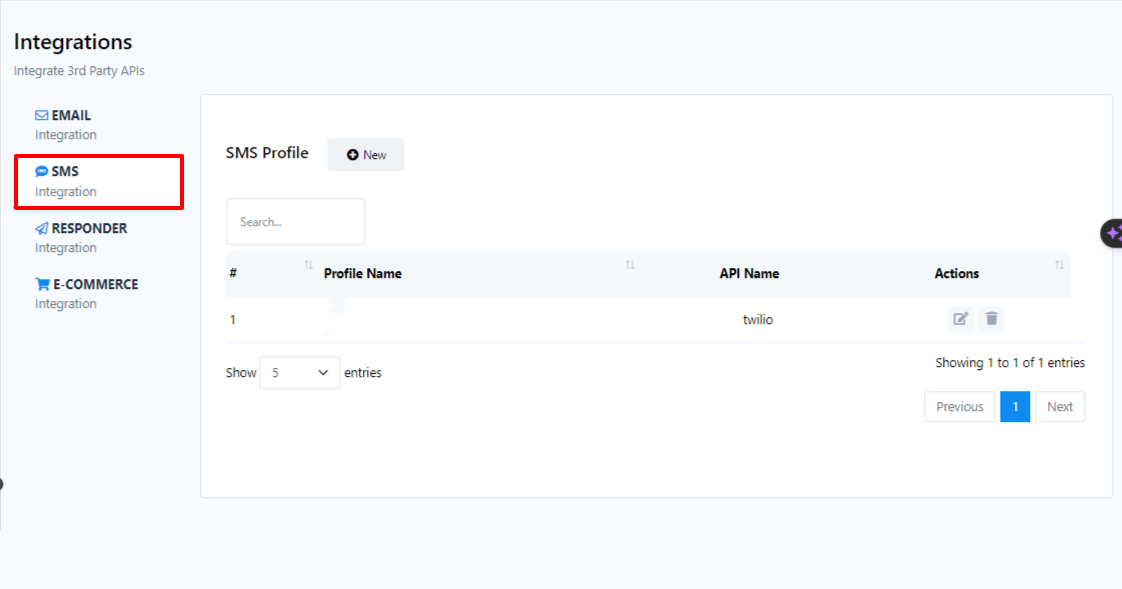
- Begin by accessing your Dashboard, and then scroll down to the `Management` section.
- Locate and click on the `Integration` option.
- Within the Integration menu, click on the `SMS` category.
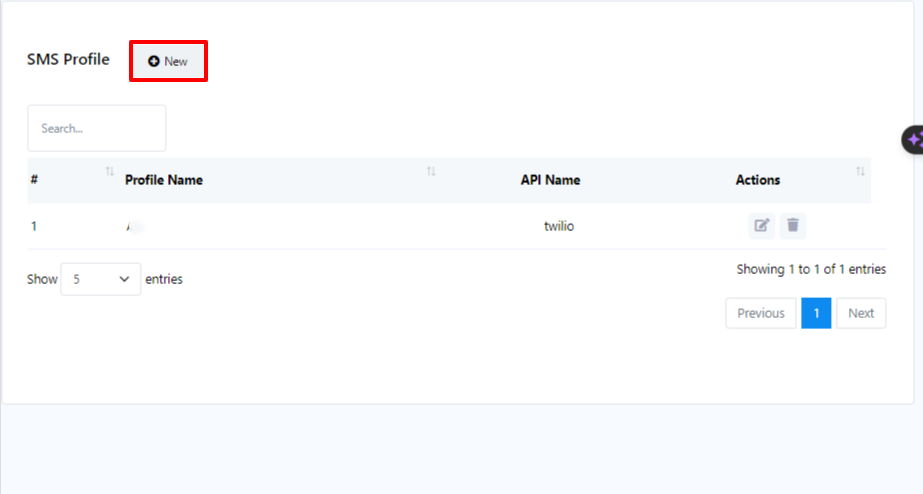
- To set up a new SMS service provider profile, click on the `New` button next to SMS Profile.
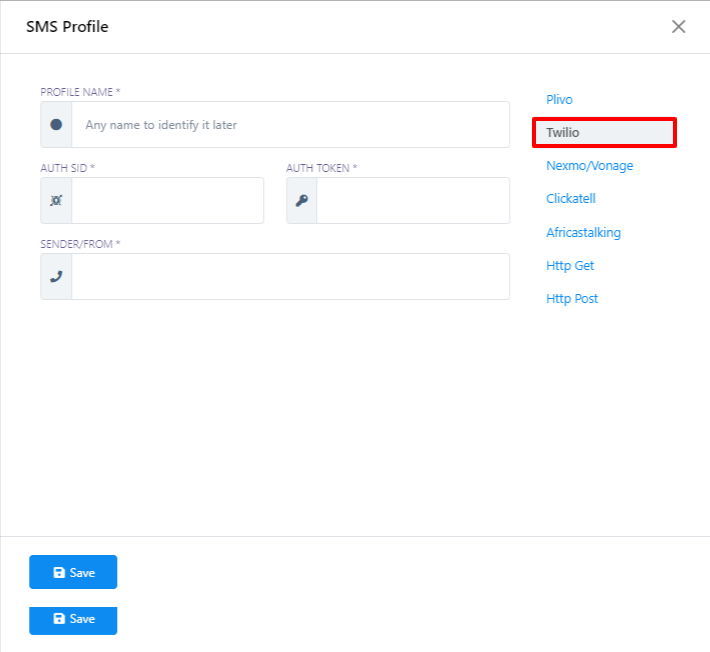
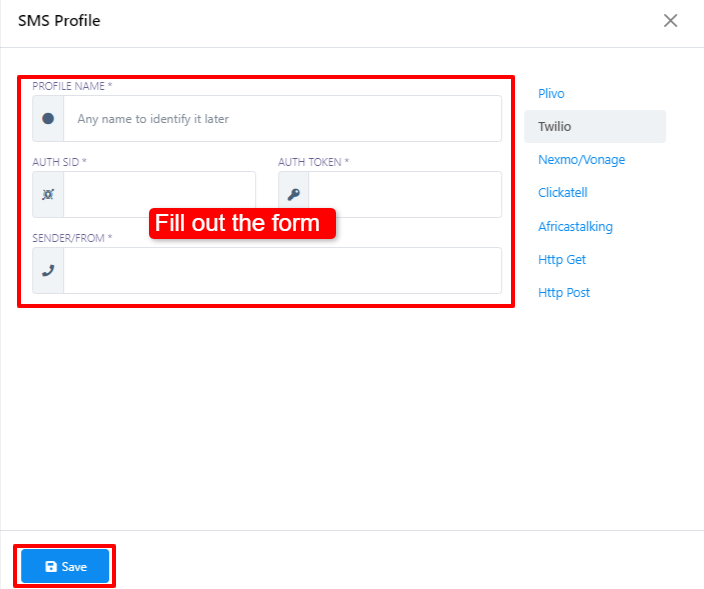
- For the purpose of this guide, we will demonstrate the process using Twilio as the chosen SMS Service Provider. Therefore, click on the `Twilio` option.
- Now, proceed to complete the form to create your Twilio profile. The necessary information for filling out this form can be found in your Twilio account.
- After you have filled out the required information, click on the `Save` button to finalize the setup of your Twilio profile.
By following these steps, your Twilio SMS service provider integration will be successfully established.
Responder
Our platform`s auto responder integration enables chatbots to gather emails from users and, if necessary, pre-programmed responses to user inquiries. This allows the chatbots to handle inquiries, offer prompt assistance, increase efficiency, and improve the user experience by responding with timely and relevant information.
To integrate Responder service provider, you can follow these steps:

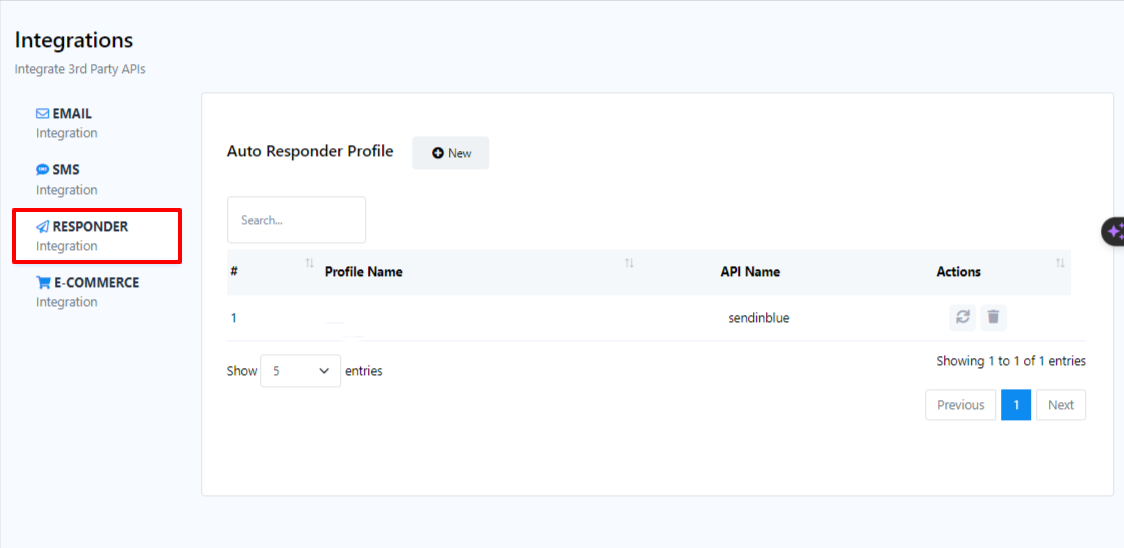
- Begin by accessing your Dashboard, and then scroll down to the `Management` section.
- Locate and click on the `Integration` option.
- Within the Integration menu, click on the `Responder` category.
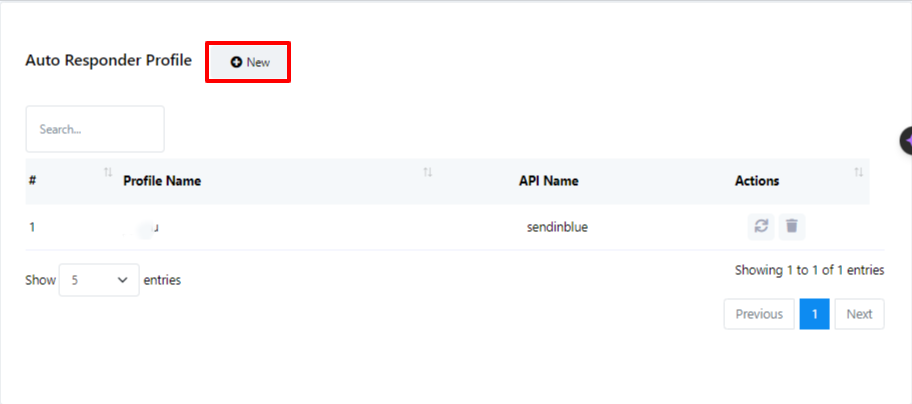
- To set up a new Responder service provider profile, click on the `New` button next to Responder Profile.
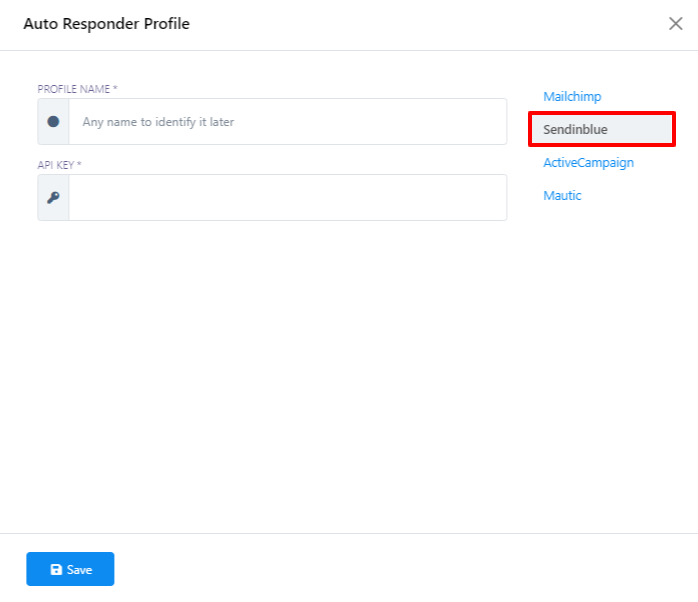
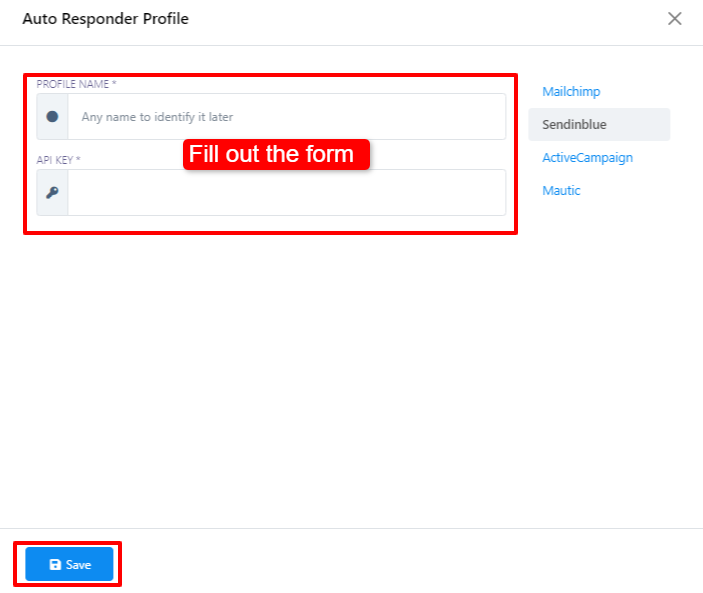
- For the purpose of this guide, we will demonstrate the process using Sendinblue as the chosen Responder Service Provider. Therefore, click on the `Sendinblue` option.
- Now, proceed to complete the form to create your Sendinblue profile. The necessary information for filling out this form can be found in your Sendinblue account.
- After you have filled out the required information, click on the `Save` button to finalize the setup of your Sendinblue profile.
By following these steps, your Sendinblue responder service provider integration will be successfully established.
E-Commerce
Our platform`s auto responder integration enables chatbots to gather emails from users and, if necessary, pre-programmed responses to user inquiries. This allows the chatbots to handle inquiries, offer prompt assistance, increase efficiency, and improve the user experience by responding with timely and relevant information.
To integrate Responder service provider, you can follow these steps:
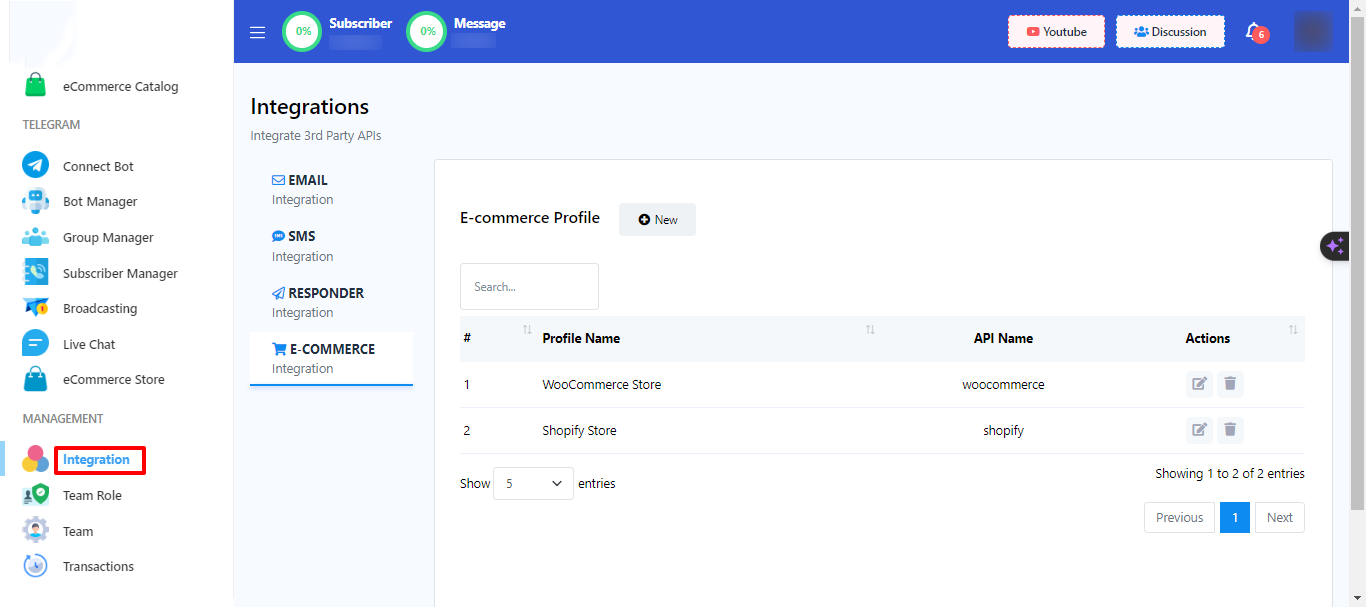
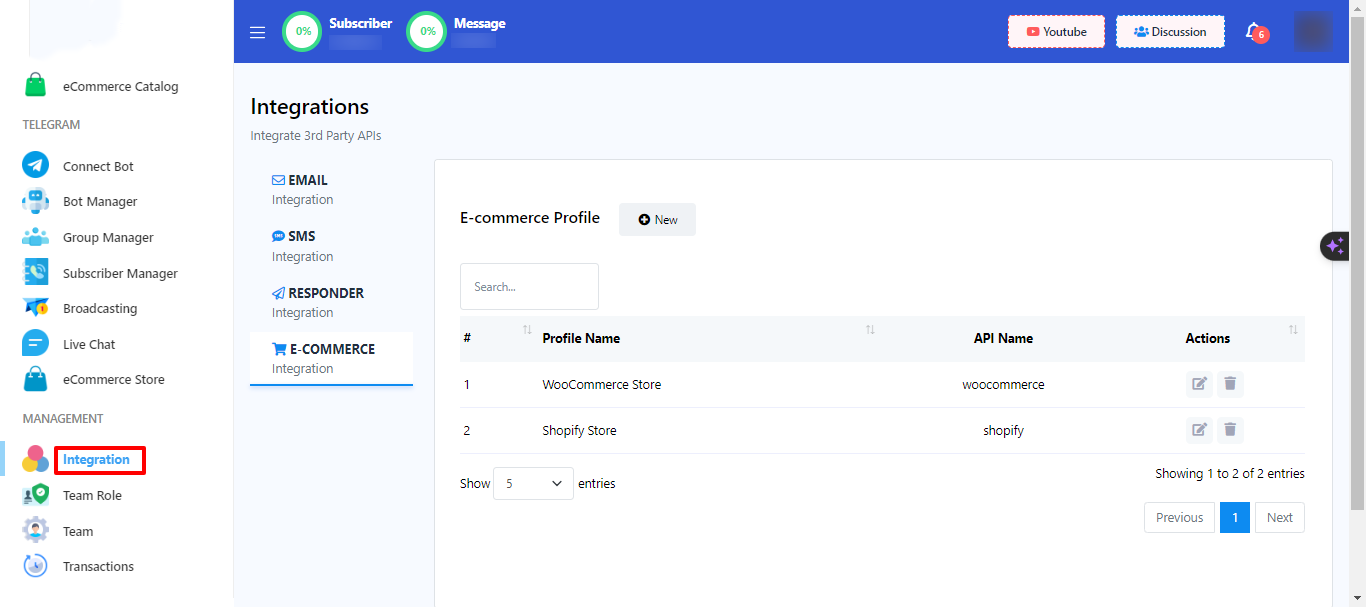
- Begin by accessing your Dashboard, and then scroll down to the `Management` section.
- Locate and click on the `Integration` option.
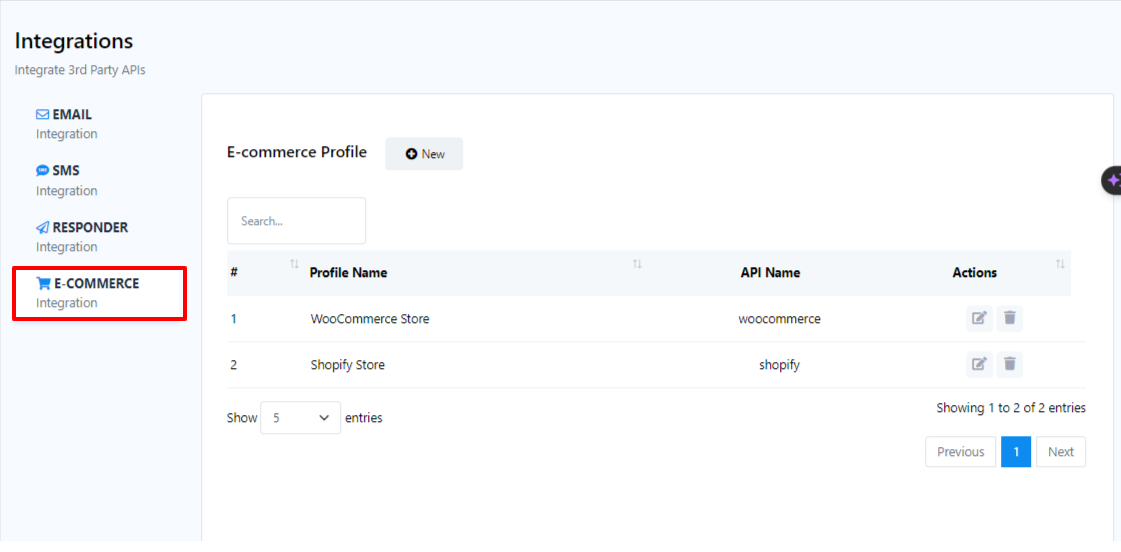
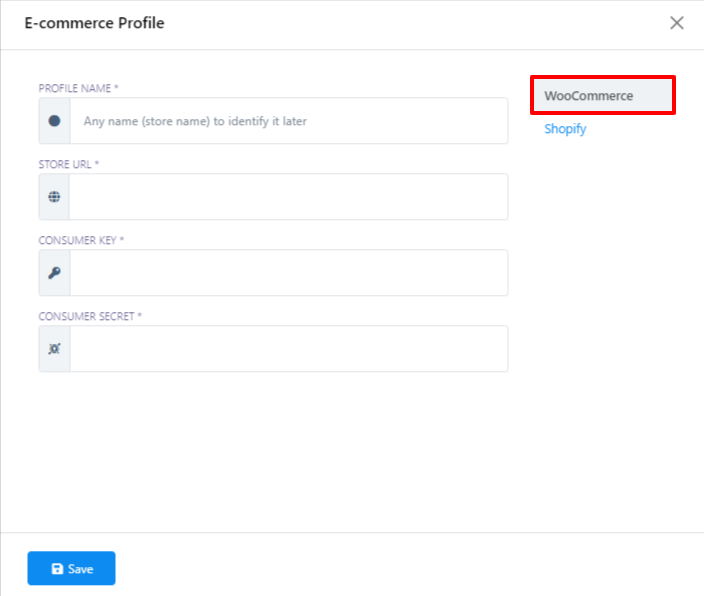
- Within the Integration menu, click on the `E-Commerce` category.
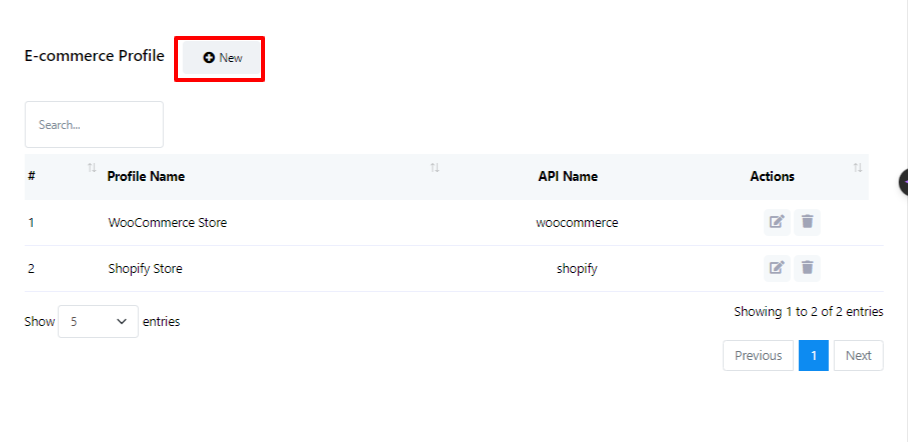
- To set up a new Responder service provider profile, click on the `New` button next to E-Commerce Profile.
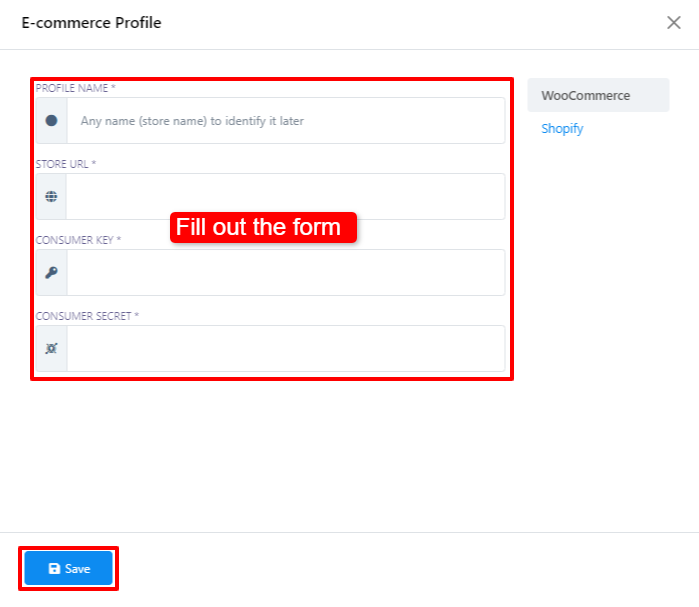
- For the purpose of this guide, we will demonstrate the process using WooCommerce as the chosen Responder Service Provider. Therefore, click on the `WooCommerce` option.
- Now, proceed to complete the form to create your WooCommerce profile. The necessary information for filling out this form can be found in your WooCommerce account.
- After you have filled out the required information, click on the `Save` button to finalize the setup of your WooCommerce profile.
By following these steps, your WooCommerce responder service provider integration will be successfully established.