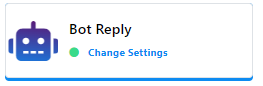
Telegram Bot Reply
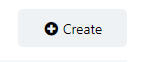
Access the Bot Manager from the dashboard’s left side menu and head to the `Bot Reply` option, there you`ll find a `Create` button located in the upper right-hand corner. To initiate the process of constructing a bot, select the bot account if you have multiple bots connected and then simply click on the `Create` button while ensuring that the `Bot Reply` option is selected.
Visual Flow Builder Editor
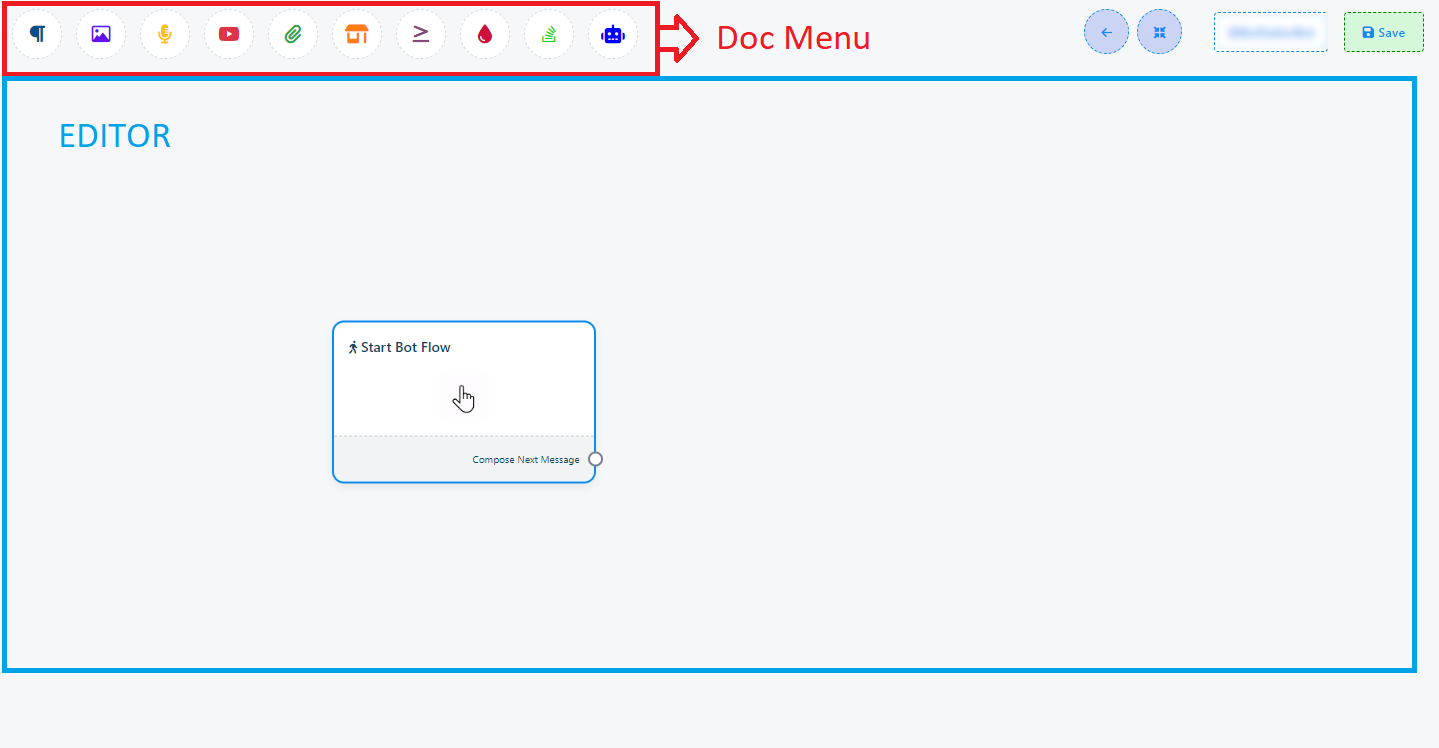
Subsequently, the Visual Flow Builder editor will become accessible, featuring two distinct sections: the `Top menu` and the `Editor`.
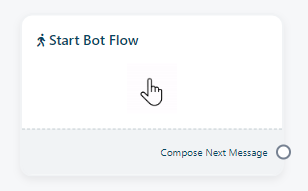
Once you`ve open the Flow Builder, you`ll find that all the components are conveniently consolidated at the upper-left corner of your screen in the `Top menu`. Simultaneously, within the `Editor` section, you`ll notice that the `Start Bot Flow` component is already preloaded for your convenience.
To construct a bot, follow these steps:
- Drag and Drop Components: Begin by dragging components from the `Top menu` and dropping them into the `Editor` section.
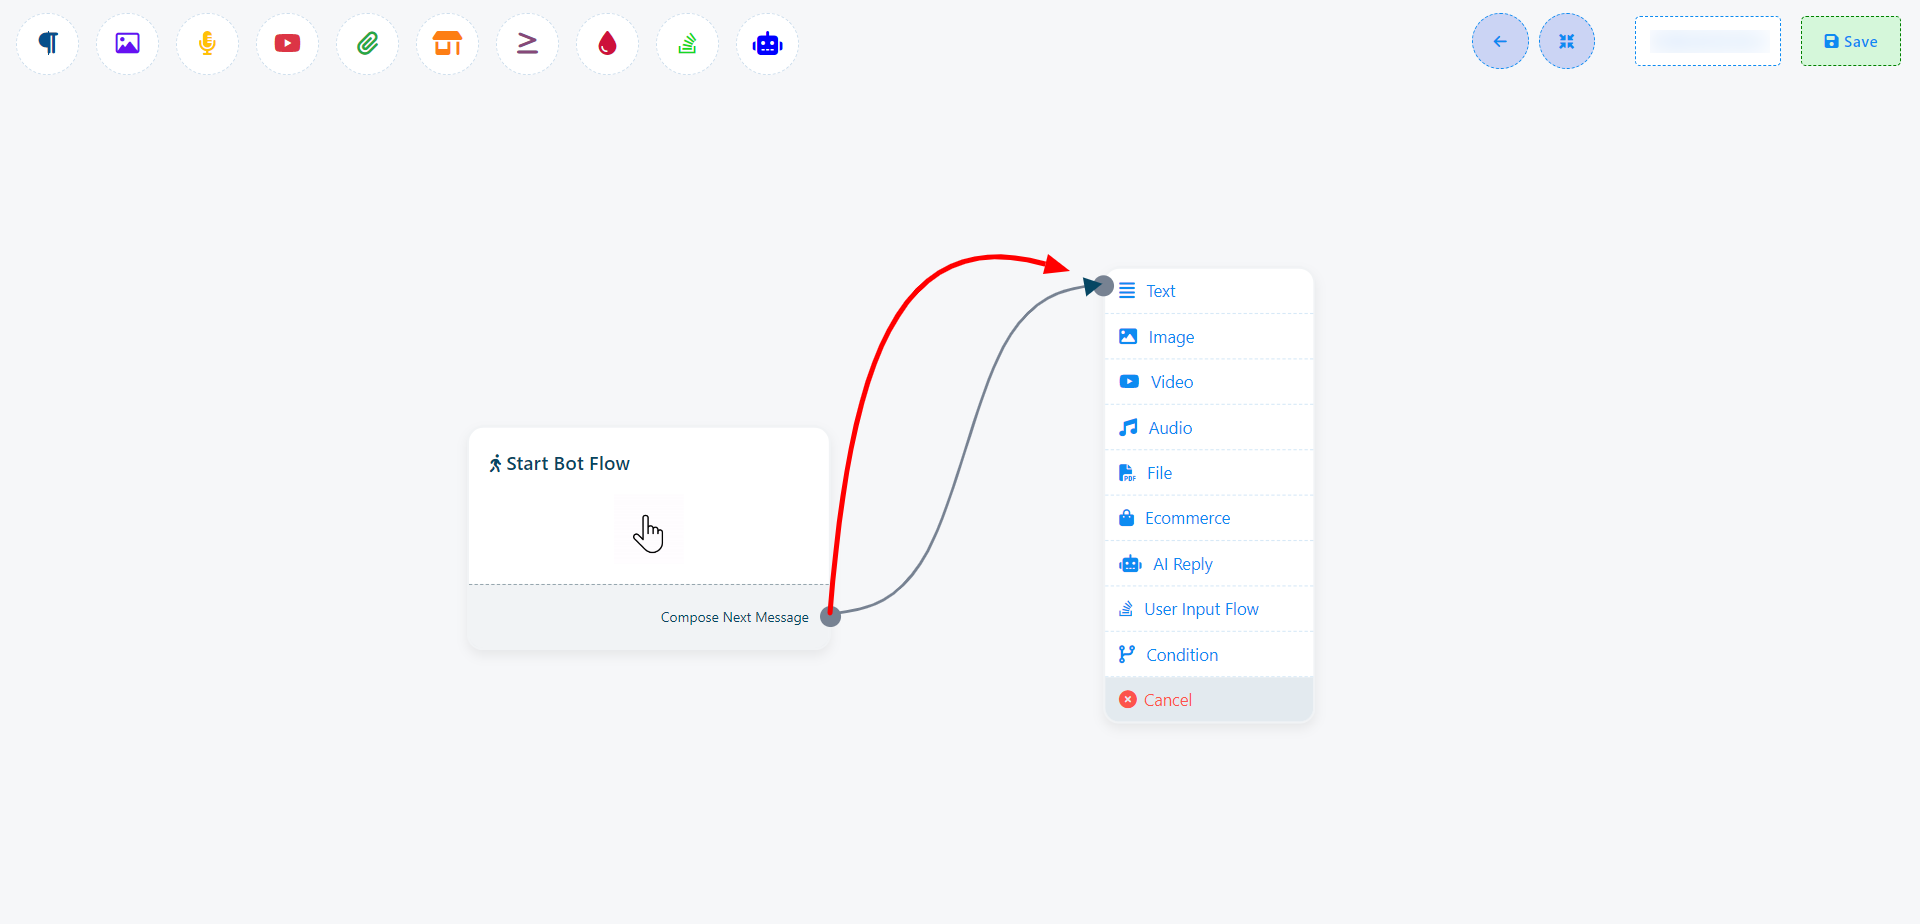
- You can drag from the socket and find a list to add new a component. (Add components without dragging from Top-menu)
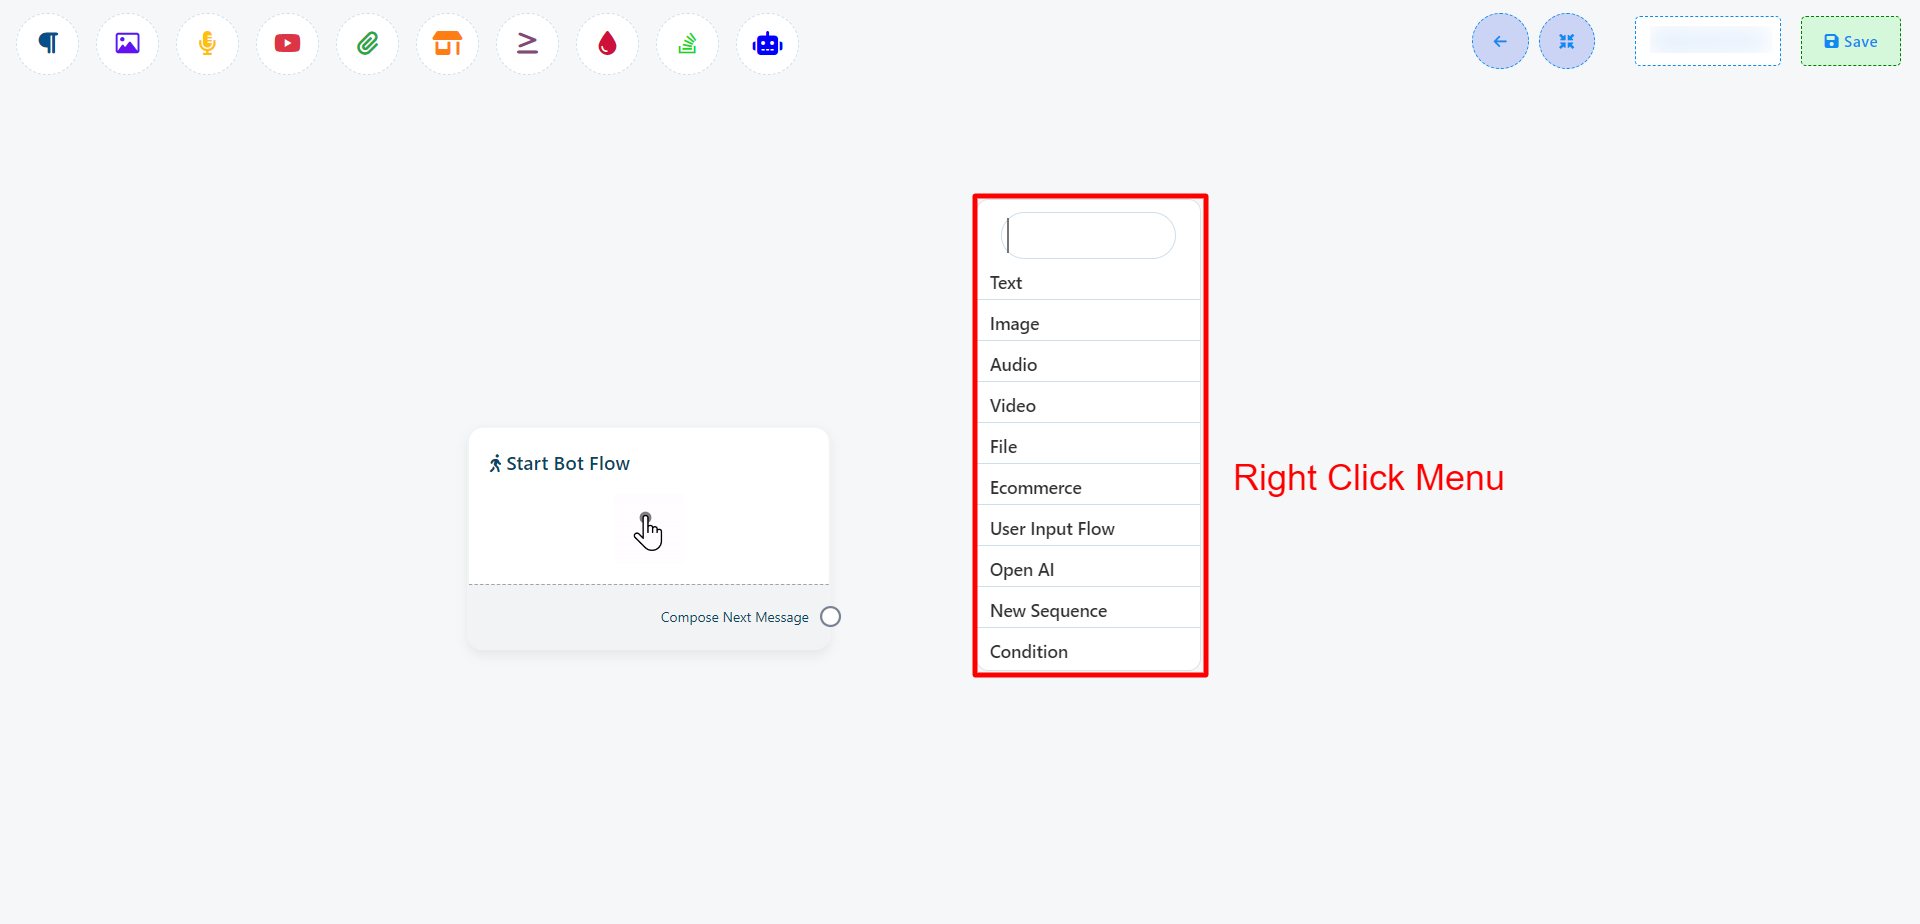
- You can right click on to the editor and you will find a list of components and you can select a component from there.
- Configuration: Configure these components according to your requirements.
- Connect Components: Establish connections between the components to create a functional flow.
There are two other ways to add a new component in you bot flow:
You can also add components without dragging the component from the Top-menu and dropping it on the editor. From the sockets of any component, drag the cursor and drop it on the editor.
Adding components to your chatbot is flexible and doesn`t always require dragging from the Top-menu to the editor. You can also do it directly from the sockets of any component. Here`s how:
Drag and Drop from Sockets: From the sockets of any component, simply drag the cursor and drop it onto the editor.
Component Selection: In most cases, this action will instantly display a menu containing various components and a cancel button. From this menu, you can select a component, and it will appear in the editor, automatically connected to the parent component.
Cancel Option: If you decide not to select a component and want to dismiss the drop-down menu, click on the Cancel Button
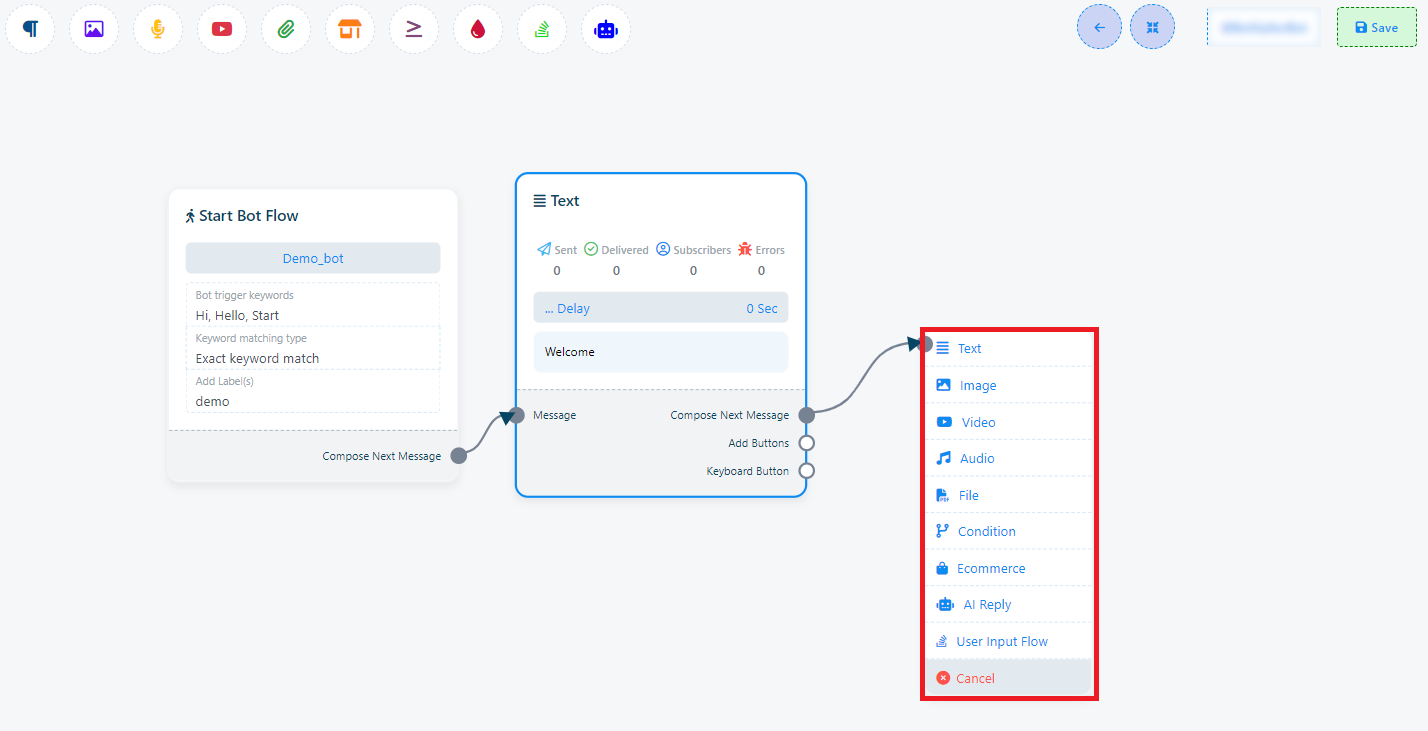
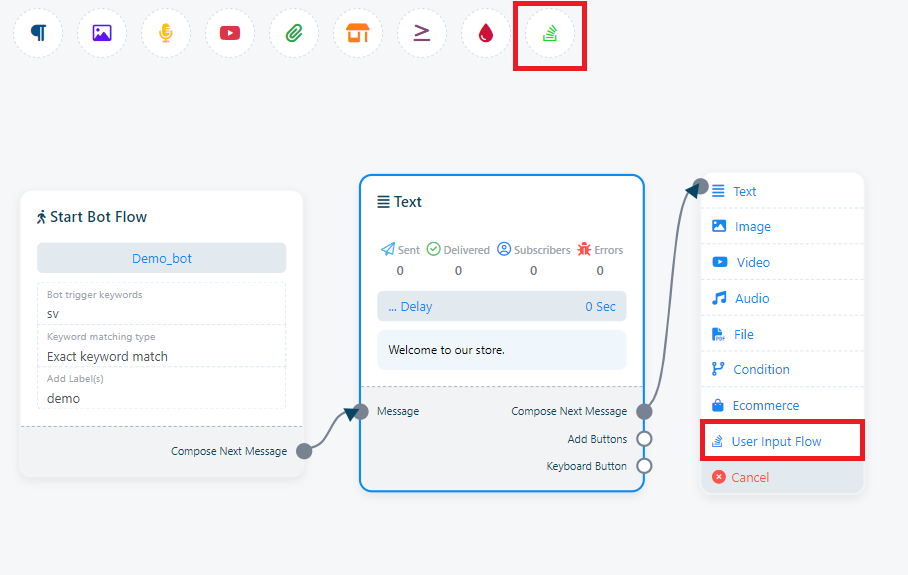
For instance, let`s say you drag from the next output socket of the text component. This will trigger a drop-down menu showcasing different components such as Text, Image, Video, Audio, File, Ecommerce, User Input Flow, and a Cancel button. From this drop-down menu, you can choose your desired component. If you wish to cancel and not add a component, simply click on the Cancel button.
(In this documentation, we`ve employed a variety of approaches, distinct from these three methods, for creating bots)
Start bot flow
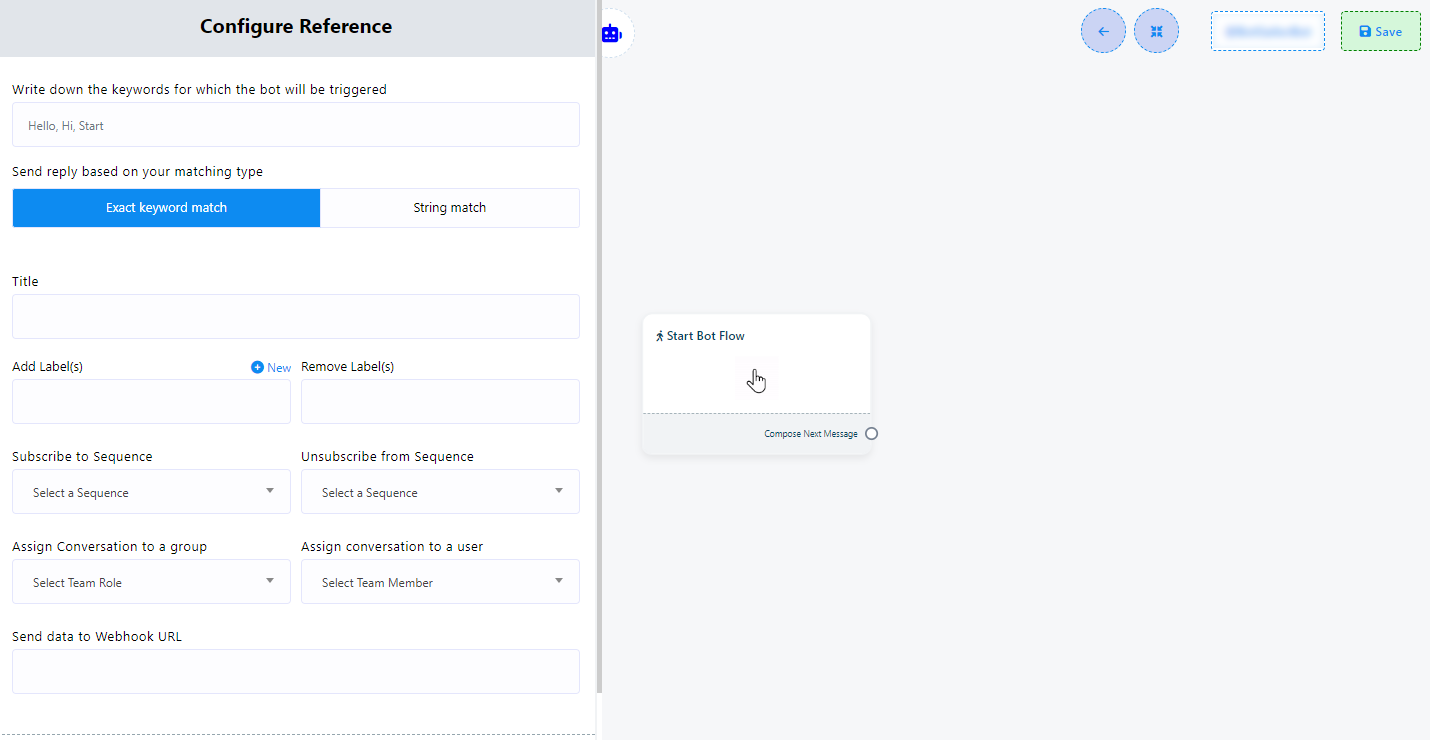
Within the `Editor` section, you’ll еncountеr a crucial еlеmеnt known as the `Start Bot Flow` This component serves as the foundation for building your bot. Out of the ten fields, `Keyword Triggering`, `Matching Type`, and `Title` are mandatory to fill. You can use other fields if you need them.
To configure this еlеmеnt, you must know:
- Keyword Triggering: To initiate the bot using specific keywords, double-click on the `Start Bot Flow` element. This action will open the `Configure Reference` left sidebar, featuring ten fields and two buttons. In the keyword field, add keywords and separate them with commas when you add more than one keyword. When a user enters text in the messaging window that matches any of these keywords, the bot will be activated
- Matching Type: You can choose the matching type by clicking on one of the two buttons provided: `Exact Keyboard Match` or `String Match`. By default, `Exact Keyboard Match` is selected. With this option, the bot will start only if the user`s input matches the keyword exactly. In contrast, with `String Match`, the bot will trigger if the user`s input partially matches the keyword.
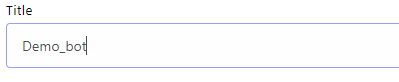
- Title: Assign a title to your bot in the `Title` field. This title is simply a name for your bot.
- Add Labels: Utilize labels to categorize your audience into different segments, such as demographics, interests, or purchase history. This enables targeted messaging and campaigns tailored to each group, improving engagement and conversions. (You can create a new label by clicking `+ New` if needed).
- Remove Labels: If needed, you can remove labels from users by using this field.
- Subscribe to Sequence: Sequences enable you to send a series of automated messages to your chatbot subscribers over time. This can be useful for onboarding new subscribers, nurturing leads, promoting products, or re-engaging inactive subscribers.(you will find more information about this on sequence section in this documentation)
- Unsubscribe from Sequence: This field allows you to unsubscribe a user from any sequence.
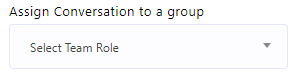
- Assign Conversation to a Group: Assign conversations to specific groups within your organization. For example, you can assign a conversation to your executive group, allowing any member of that group to handle it.
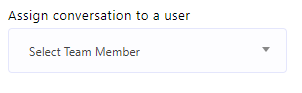
- Assign Conversation to a User: Assign conversations to individual team members. For instance, you can assign a conversation to your manager, designating them as the responsible party.
- Send Data to Webhook URL: Add your webhook link to send bot data to a specified URL. This facilitates easy data storage via webhook integration.


Webhook: webhook is a feature that allows you to connect your telegram bot to external systems or services, enabling automatic data transmission and communication between your bot and other compatible software. This integration helps automate processes and enhances the functionality of your chatbot.
Once you`ve filled out these fields according to your requirements, click the `Save` button to save your settings. If needed, you can also use the `Close` button to cancel the configuration process.

Simple steps of configuring the Start Bot Flow:
- Go to the `Bot Manager`.
- Select your bot.
- Choose `Bot Reply`.
- Click on `Create`.
- Double-click on `Start Bot Flow`.
- Enter your comma-separated keywords.
- Choose between `Exact keyboard match` or `String match`.
- Provide a title for your bot.
- Add a label (You can create a new one by clicking `+ New` if needed).
- Select a Sequence if desired (You can create a new sequence here as well).
- Assign the conversation to a group based on team roles (If necessary).
- Assign the conversation to a specific team member (If needed).
- Include a Webhook URL if you want to send data to a webhook.
- Save your changes by clicking the `Save` button or cancel them using the `Cancel` button.


Webhook: webhook is a feature that allows you to connect your telegram bot to external systems or services, enabling automatic data transmission and communication between your bot and other compatible software. This integration helps automate processes and enhances the functionality of your chatbot.

Once you`ve completed the `Start Bot Flow` setup, you`ll see a socket called `Compose Next Message`, These sockets allows you to add various reply components. After adding components, we must configure them accordingly.
For the `Compose Next Message` socket, you can add text, images, audio, video, or file components and configure them as follows:
Use of Text Component:
Enter your reply message in the `Please provide your reply message` field. Utilize the `Delay in reply` option if you need to introduce a delay in your response to the customer`s message.
However, in certain situations, rather than displaying a list menu with various components, a single component will appear already connected to the parent component.
For instance, if you drag from the button output socket of the text component and drop it onto the editor, the button component will immediately appear in the editor, already linked to the parent component.
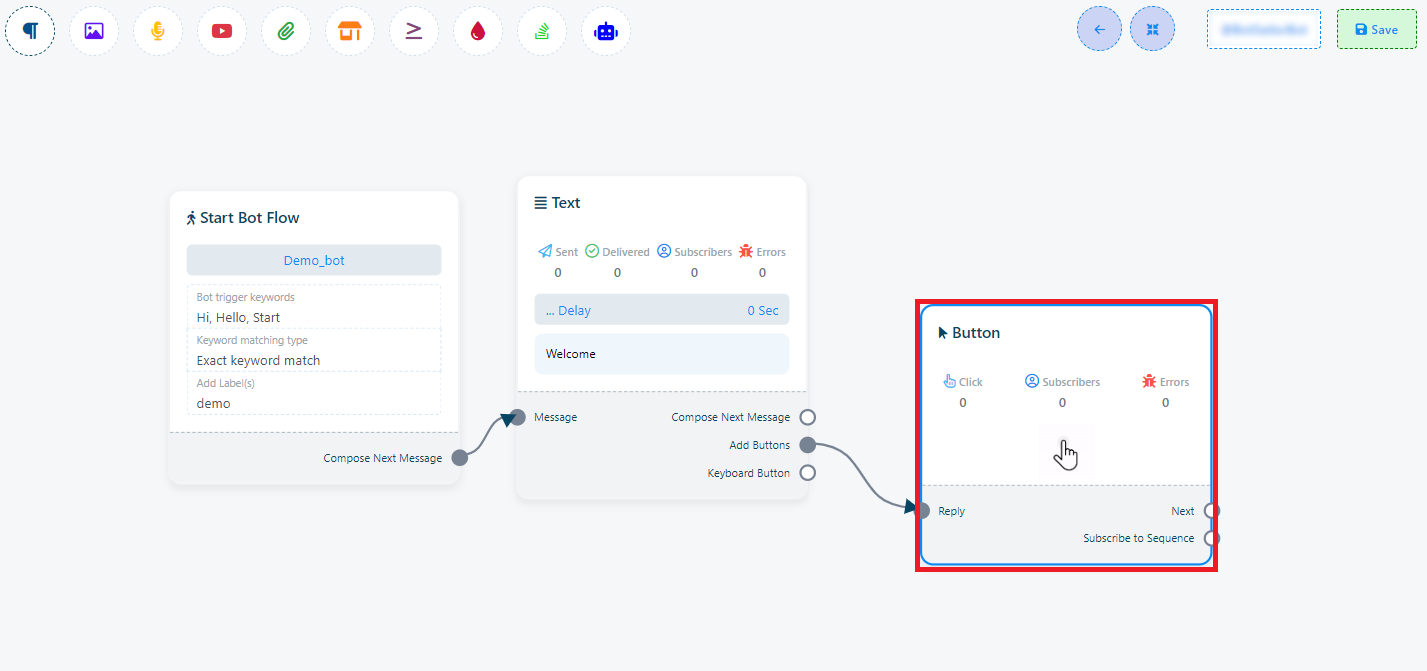
The Button component is not present in the Top-menu.
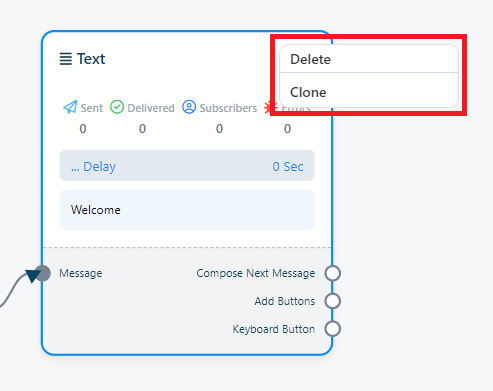
Clone and Delete component
Feel free to duplicate or remove components at any point in time. All you need to do is right-click on the component you want to manage. This will trigger a drop-down menu with two choices: `Clone` and `Delete`. Opt for `Clone` to create a copy of the component or choose `Delete` to permanently remove it from your setup.
Text
To construct a bot featuring a text element, follow these steps:
Adding Text Component: Begin by dragging the `Text Component` from the available options and dropping it onto the editor.
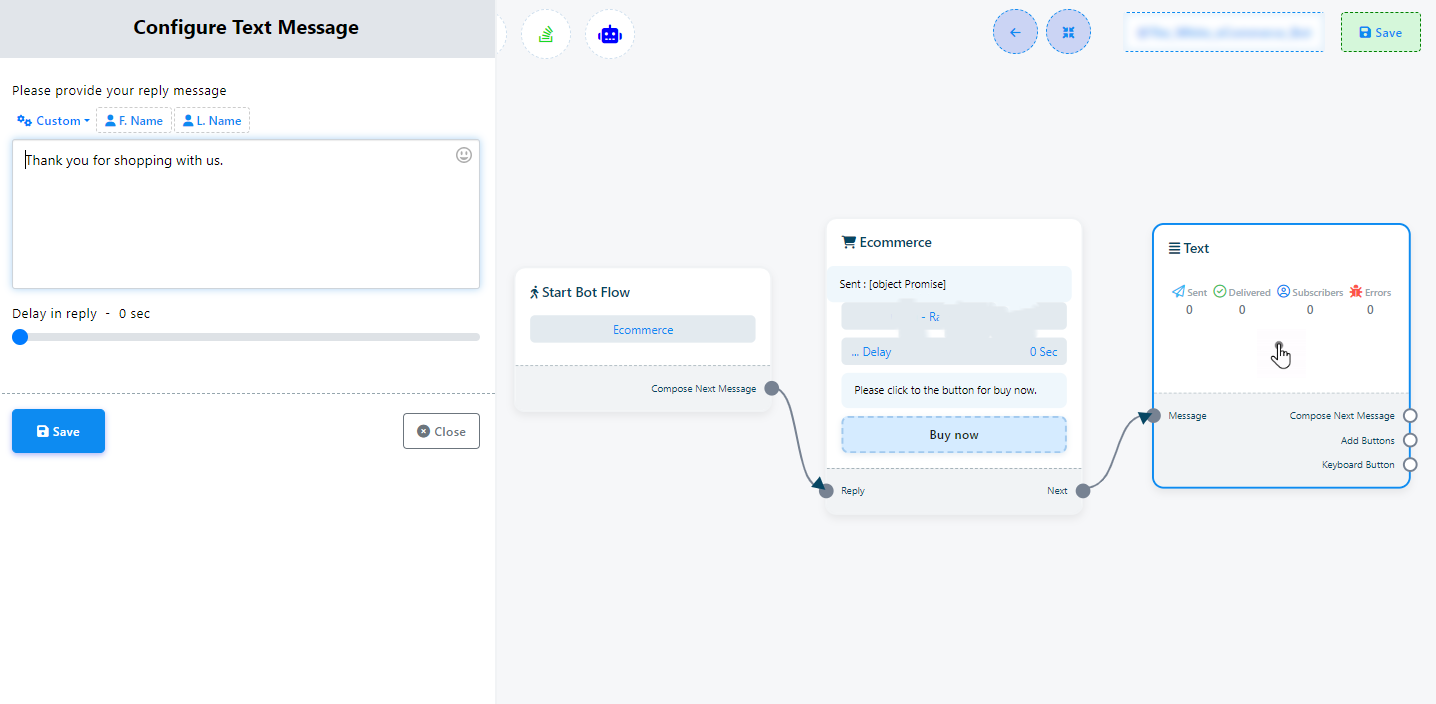
Configuration: Double-click on the text component, which will prompt the appearance of a sidebar labeled `Configure Text Message`. Within this sidebar, you`ll find a text field.
Message Input: In the text field, you can input your reply message. Here, you also have the capability to include dynamic elements like the user`s first name, last name, or custom field variables within the reply message to personalize the interaction.
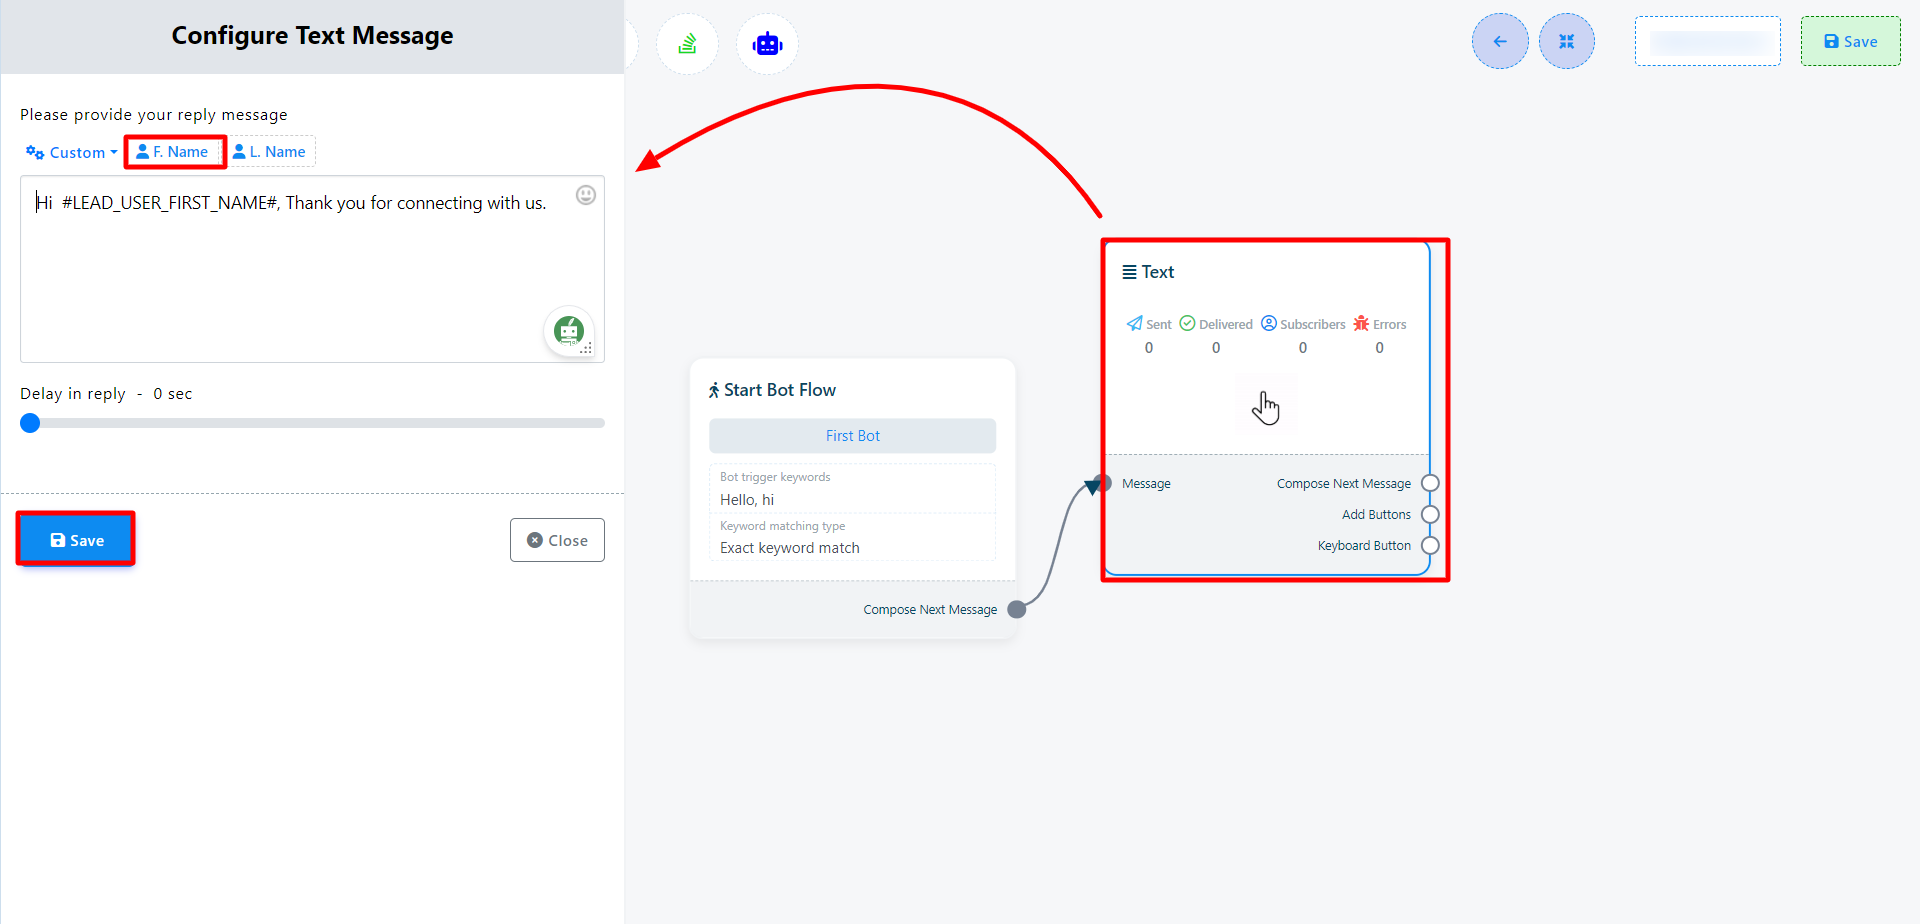
Now click on the Save button and the information will appear on the component. Then connect the text component with the Start bot flow component.
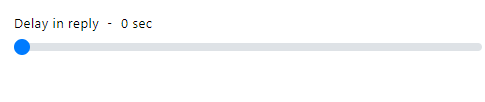
By selection Delay in reply you can set the delay time of your reply.
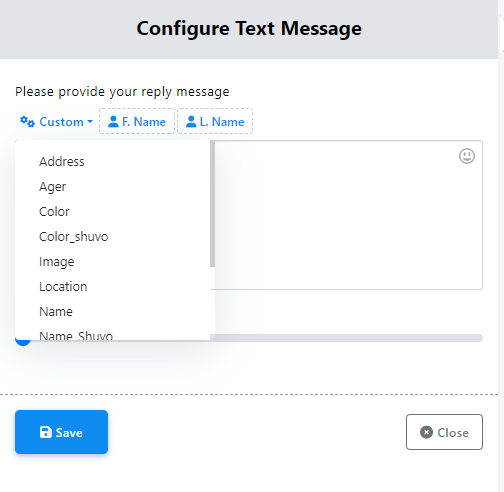
Include Custom variables in the reply message
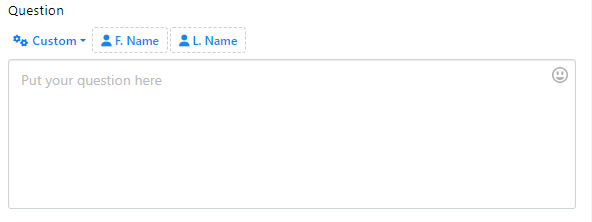
You can also insert custom variables into your reply message. Click the `Custom` button, select a variable from the drop-down menu, and it will be replaced with the actual value before sending the message.
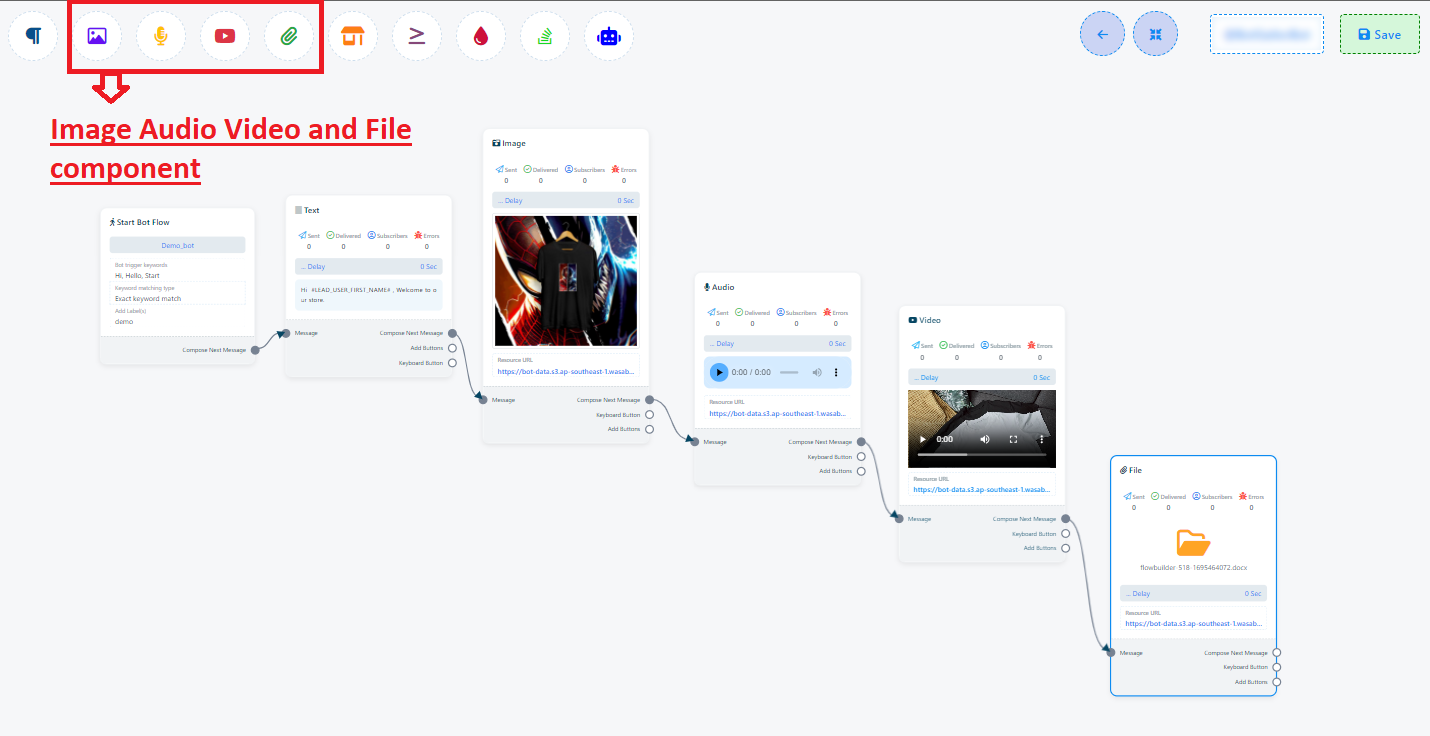
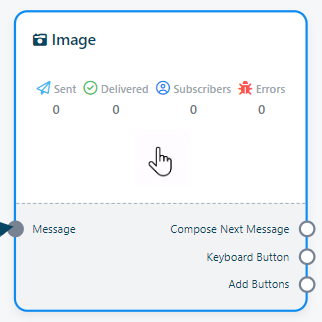
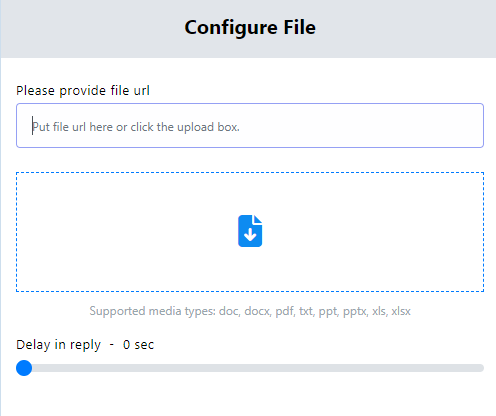
Image, Audio, Video, and File component:
Similarly, you have the option to incorporate image, audio, video, and file components into your chatbot. To use these components, you`ll need to upload the corresponding image, audio, video, or file. Afterward, you can establish connections between these components and other elements as needed.
In summary, here`s a quick guide to adding and configuring various components for your Chabot:
Text Component:
- Add a text component and double-click on it.
- In the `Reply message` field, enter your desired reply.
- Set Delay in reply (If needed)
- Add an `Image` component from the Top Menu.
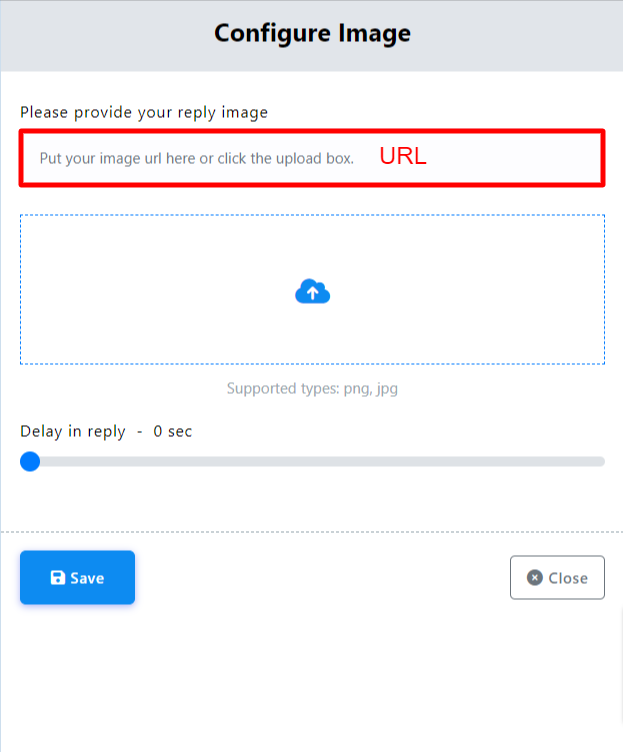
- Set the image, you can use a URL of the image or just upload an image.
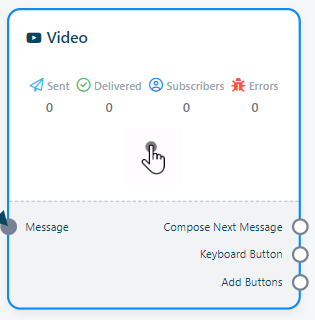
- Add a `Video` component from the Top Menu.
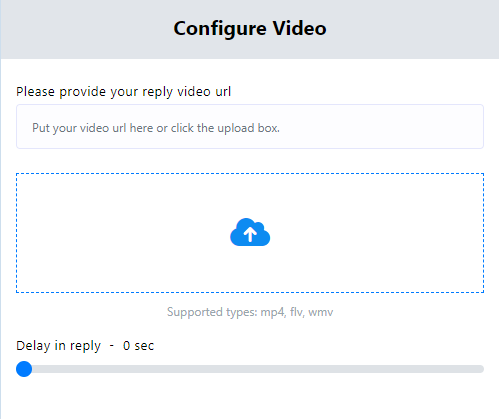
- Double-click on the Video component and set a video using its URL or by uploading one.
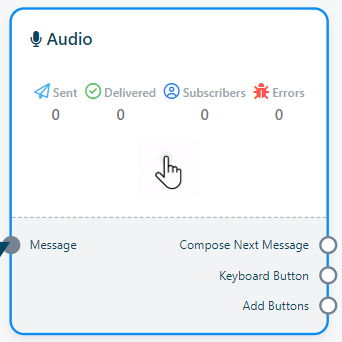
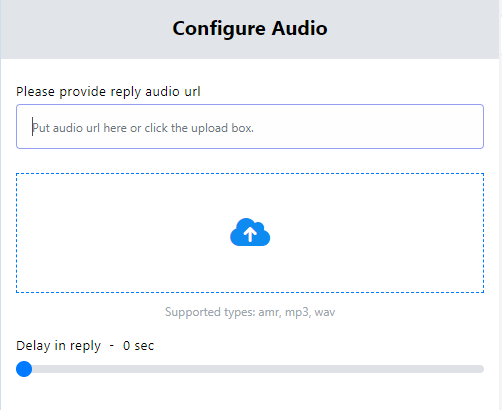
- Add an `Audio` component from the Top Menu.
- Double-click on the Audio component and set an audio using its URL or by uploading one.
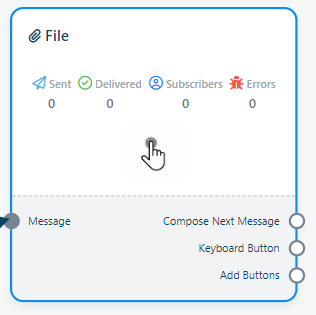
- Add a `File` component from the Top Menu.
- Double-click on the File component and set a file using its URL or by uploading one.


Image Component:
Video Component:
Audio Component:
File Component:
This straightforward guide will help you quickly and effectively configure these components for your chatbot.
Keyboard
You also have the option to incorporate a Keyboard component into your bot. This particular component is designed to gather user phone numbers and locations.
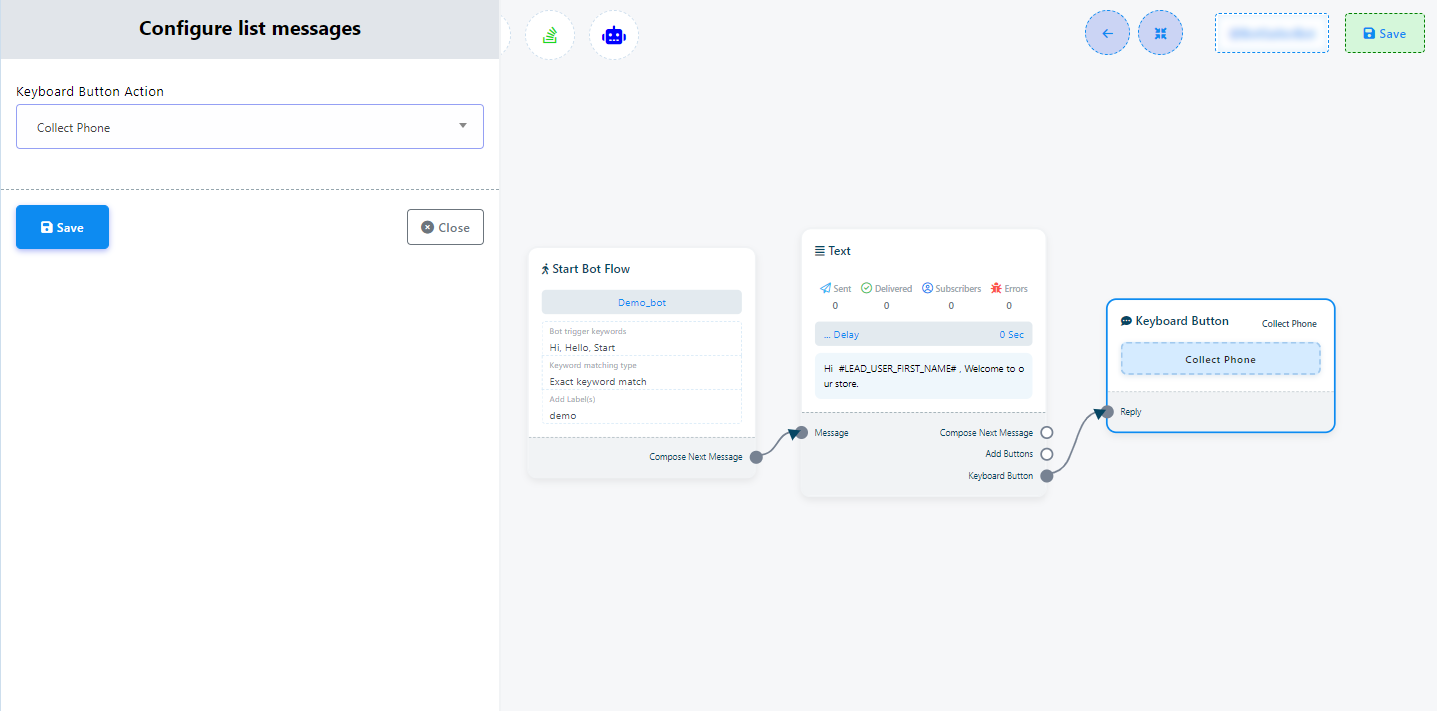
Setting up the Keyboard component is as follows:
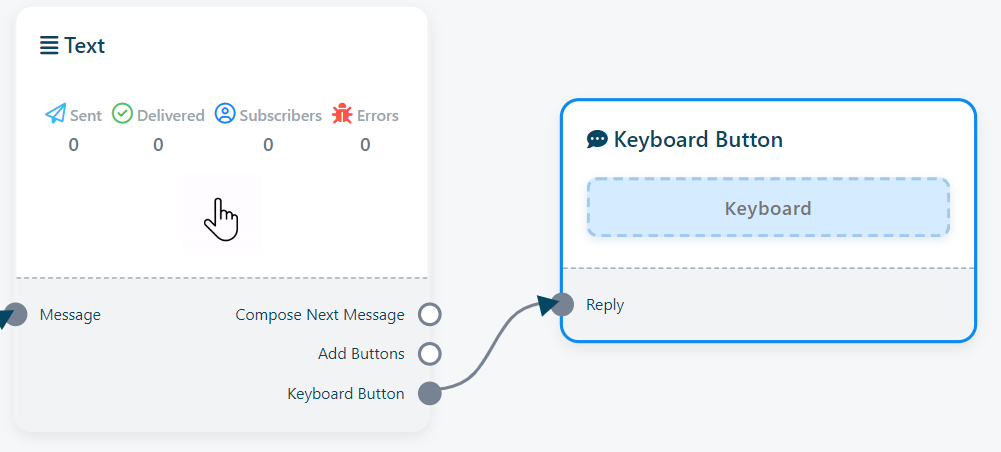
- To include this component, simply drag your cursor from the `keyboard button socket` of Text, Image, Audio, Video, or File components and release it onto the editor. This action will immediately introduce a Keyboard component connected to the parent component.
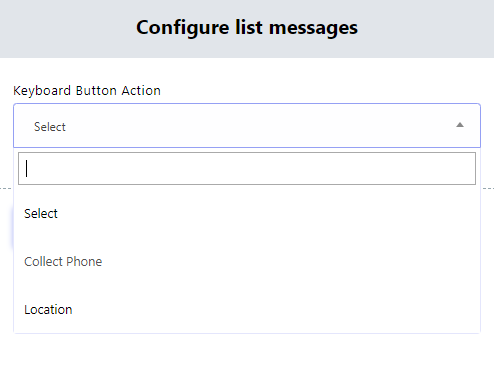
- Next, click on the field within the Keyboard component. This will trigger a drop-down menu, presenting options for collecting either phone numbers or location information.
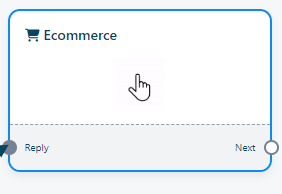
Ecommerce
The Ecommerce component is a user-friendly, drag-and-drop feature that facilitates seamless integration between your Telegram bot and an Ecommerce store. This powerful capability enables you to establish a comprehensive online store experience directly within your Telegram bot interface. (You will find more information about Ecommerce in Ecommerce section in the documentation)
Configuring the Ecommerce feature is accomplished through the following steps:
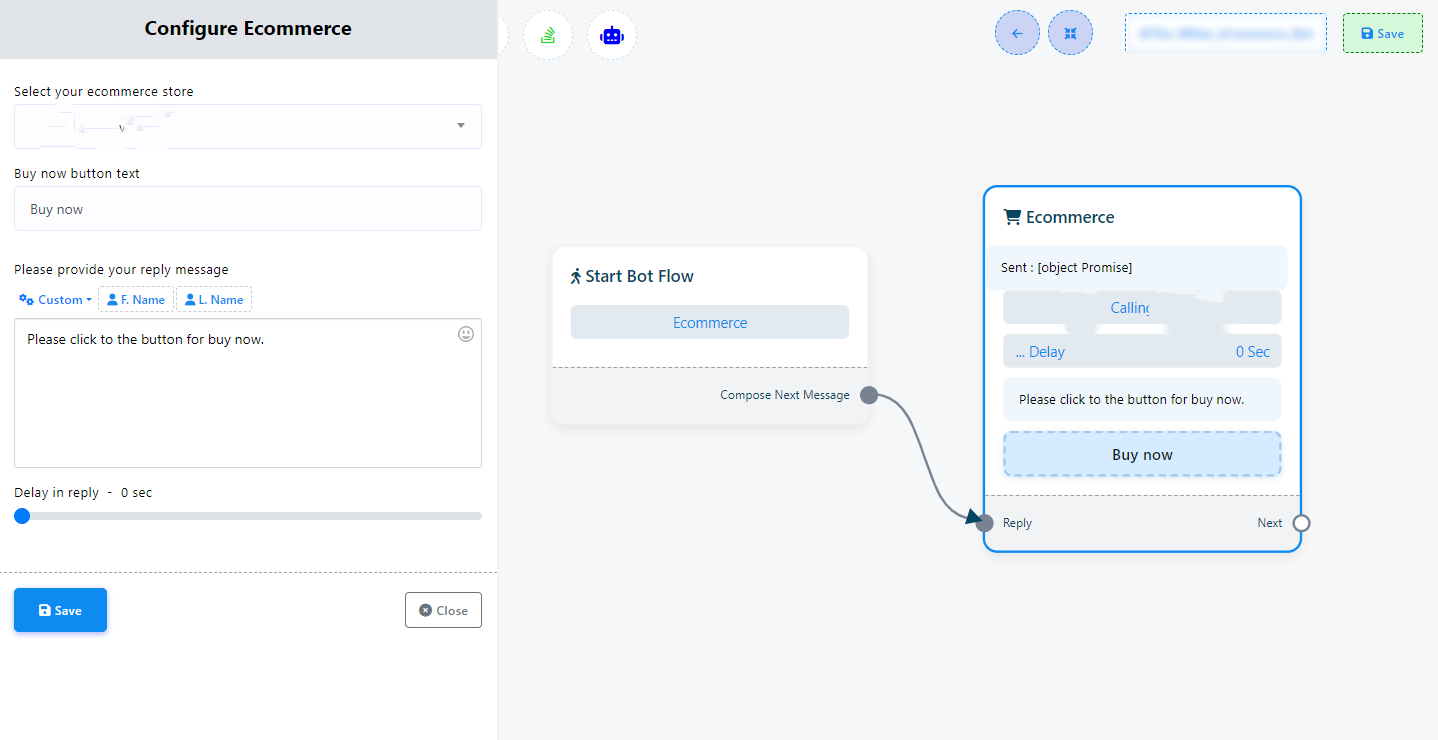
- Begin by dragging the Ecommerce component from the Top-menu and dropping it onto the editor.
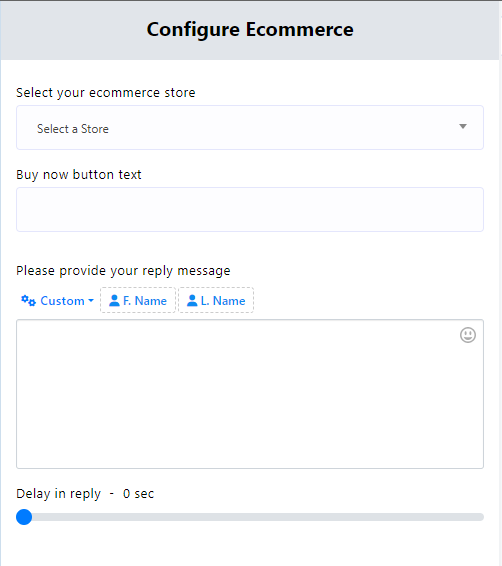
- Double-click on the Ecommerce component to access its settings. Here, you can:
- Select your specific ecommerce store from the `Select your ecommerce store` field.
- Optionally, add a `Buy now button` by specifying the desired text in the `Buy now button text` field.
- If necessary, set a custom message using the `your reply message` field.
To conclude, you can provide a final message to complete the interaction. To do this, drag your cursor from the `Next` socket of the Ecommerce component and select the text component. Then, enter your final message.
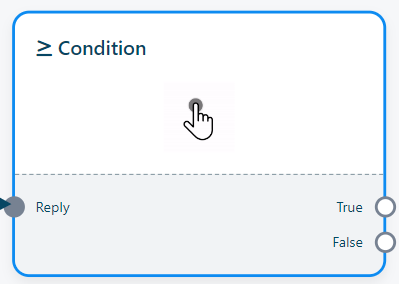
Condition
The Condition component, available within the platform, empowers users to create intelligent bots driven by conditional logic. With this feature, users can establish precise criteria that must be satisfied for particular actions or responses to be executed within a chatbot.

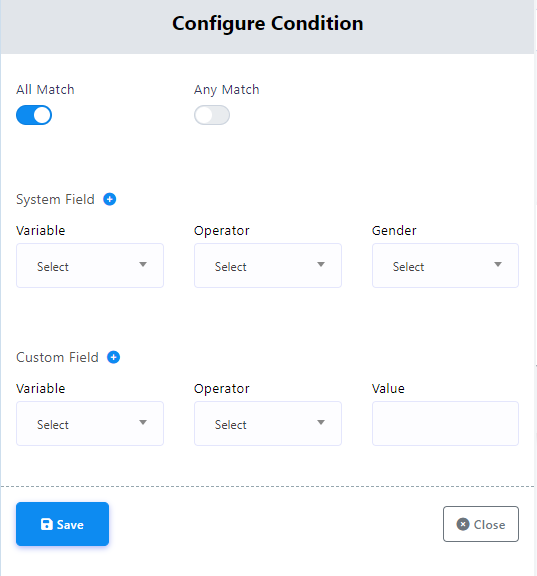
Configuring the Condition component involves the following steps:
- Start by dragging the Condition component from the Top-menu and placing it onto the editor.
- Within the Condition component settings, users have the choice of using two radio buttons: `All Match` and `Any Match`. These options dictate whether all specified conditions must be simultaneously met or if any one of them is adequate to initiate a particular action or response.
Additionally, you can apply conditions to both system field data and custom fields, selecting the desired condition by utilizing the operator field.
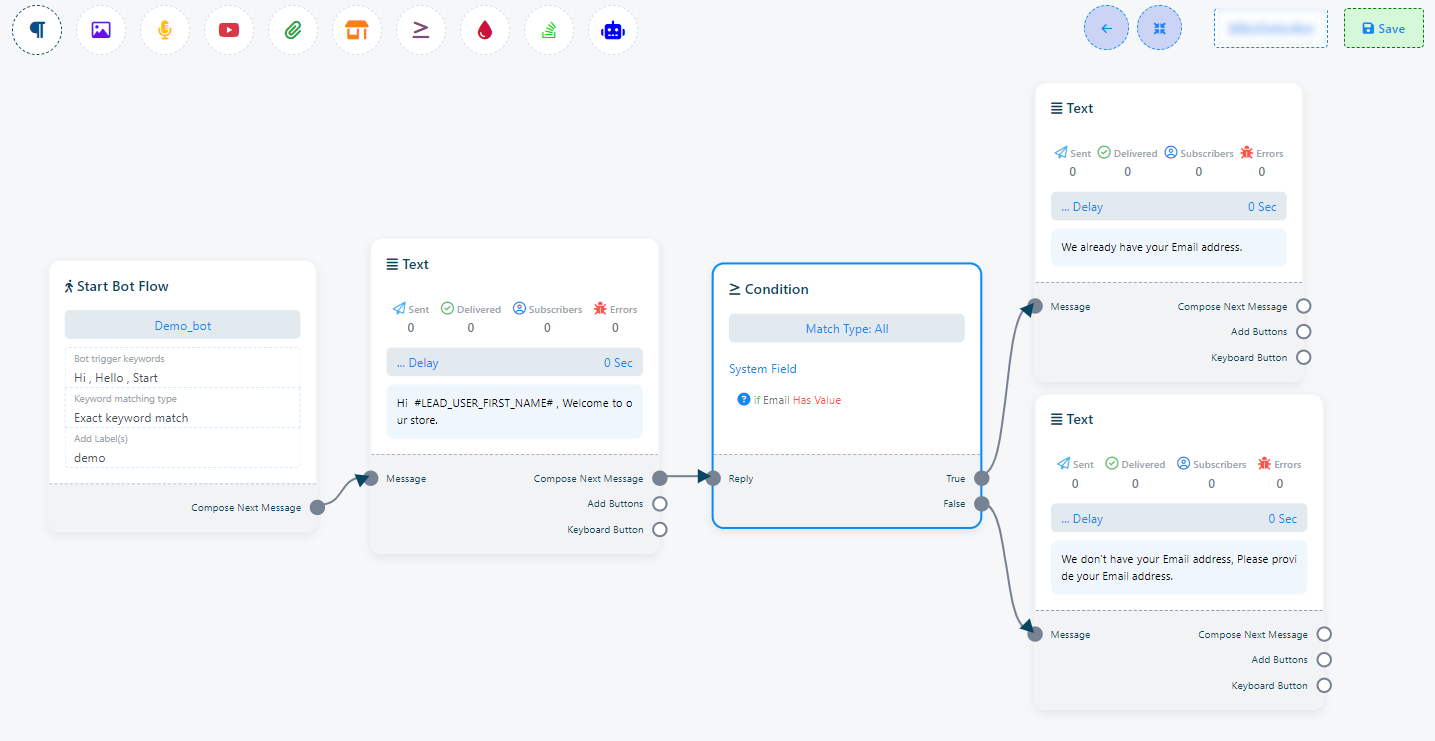
To implement this functionality, follow these steps:
- Add two Text elements to your chatbot flow.
- Connect one of these Text elements to the `True` socket of the Condition component and the other to the `False` socket.
- Click on the Text element connected to the `True` socket to compose a message that informs the user that updated information will be sent to their email address.
- Click on the other Text element connected to the `False` socket to craft a message notifying the user that the system doesn`t currently possess their email address. In this case, the bot can prompt the user for their email address using a User Input Flow message.
- If the condition evaluates to true, the message from the Text element connected to the `True` socket will be sent to users whose email addresses are already in the system.
- If the condition evaluates to false, you can connect a User Input Flow message to the Text element connected to the `False` socket. This User Input Flow message will request the user to provide their email address, which can then be saved to the system or a custom field variable as needed.
New Sequence
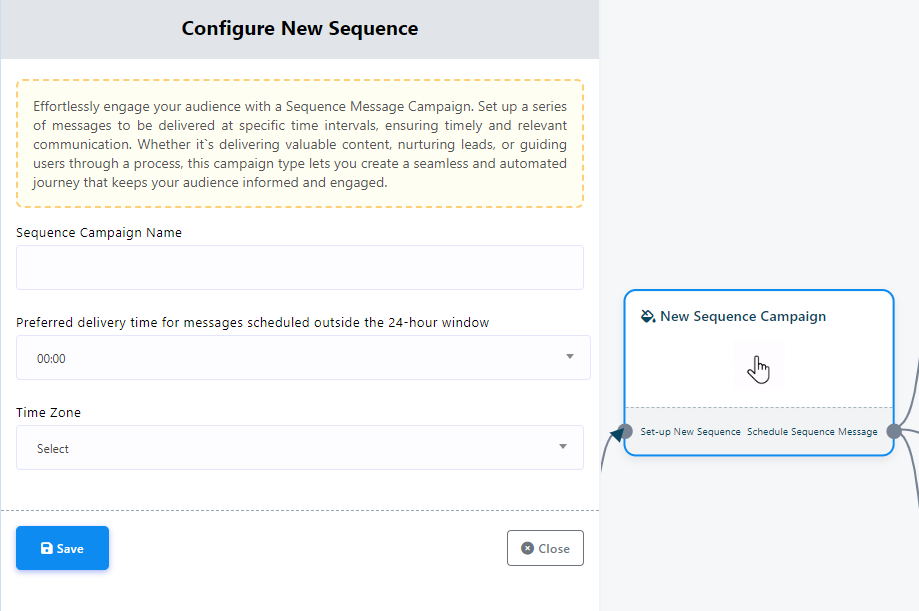
The New Sequence feature is a built-in capability within the platform, designed to empower users to create and customize sequences of messages or actions for chatbots on messaging platforms. This feature aims to elevate the quality of interactions between chatbots and users by enabling the automation of a sequence of responses or actions, triggered by user inputs or predefined triggers.
In practical terms, it allows you to configure a series of messages that are sent at precise time intervals, ensuring that communication with users remains timely and contextually relevant.
Configuring a Sequence involves several steps:
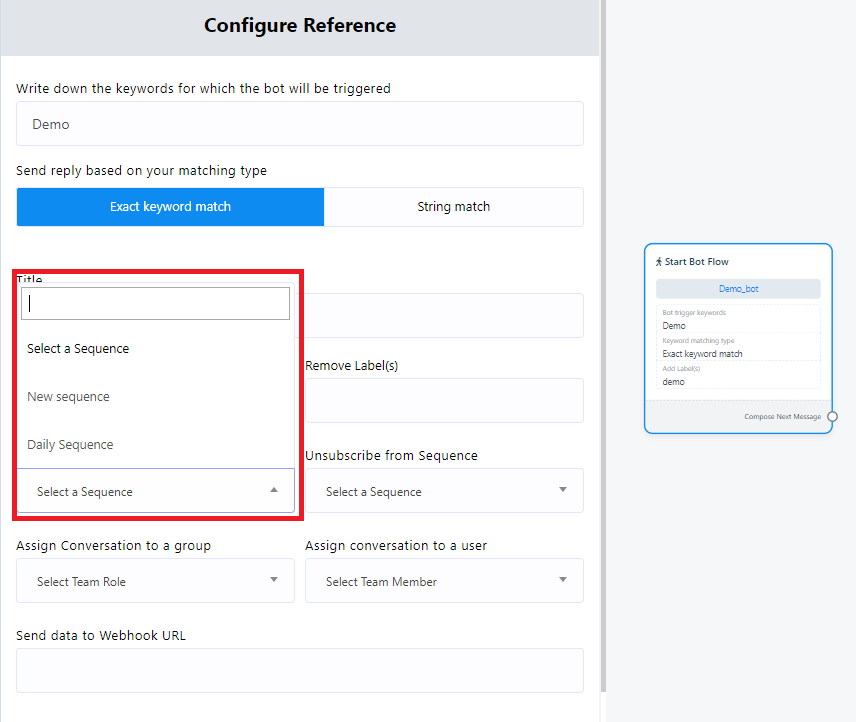
- Begin by double-clicking on the `Start Bot Flow` element. Within the pop-up menu, you`ll find the option to `Subscribe to Sequence`. Click on this option, and a new sequence will be created. Save your changes.
- After saving, you`ll notice that a sequence has been successfully generated.
- Double-click on `New Sequence Campaigns`. In this step, specify a name for your Sequence Campaign by filling in the `Sequence Campaign Name` field.
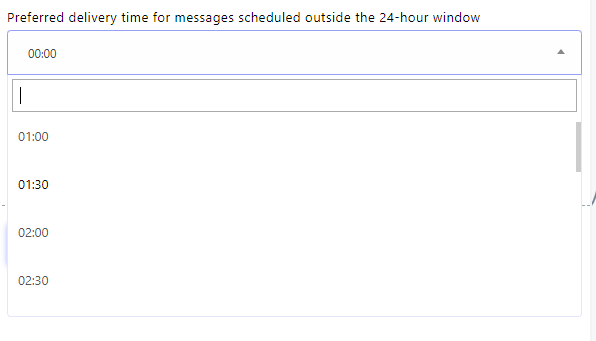
- To determine the delivery timing of your series messages, use the `Preferred delivery time for messages scheduled outside the 24-hour window` field. You can choose from preset times or manually input your preferred delivery time.
- Select your desired time zone from the `Time Zone` field to ensure accurate scheduling of your messages.
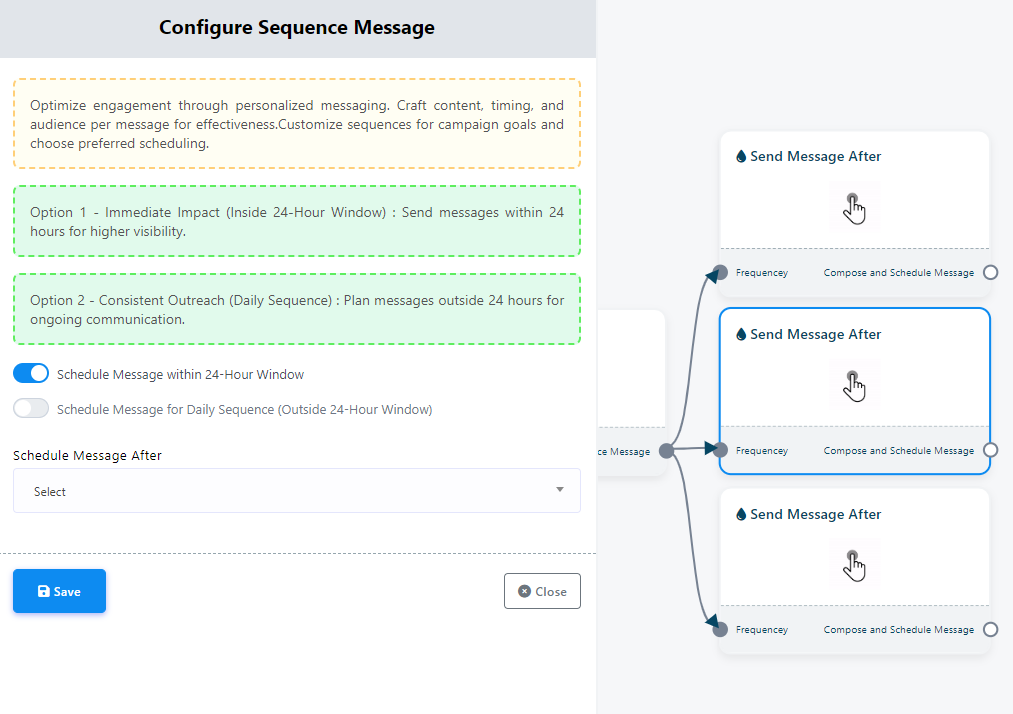
- Double-click on the `Send Message After` component. Within this component, you`ll encounter two radio buttons:
- The `Schedule Message After` component is employed to establish the message scheduling within a day. Click on the pop-up menu to access preset times, or alternatively, you can manually define the scheduling time.
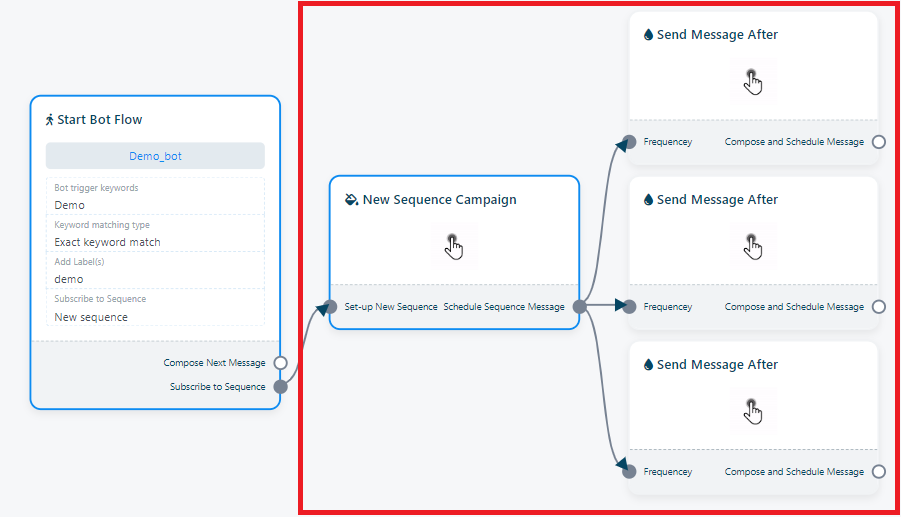
Upon completing the previous steps, you will discover three additional `Send Message After` components within the flow builder.
Here`s how to configure them:
`Schedule Message Within 24-Hours Window`: This button initiates the sequence to begin within a 24-hour timeframe.
`Schedule Message for Daily Sequence`: This button sets the sequence to commence outside of the 24-hour window.
Moreover, it`s important to note that you can include multiple sequences within a single `Flow Builder` by utilizing the designated button. Setting up additional sequences follows a similar process to the one described here.
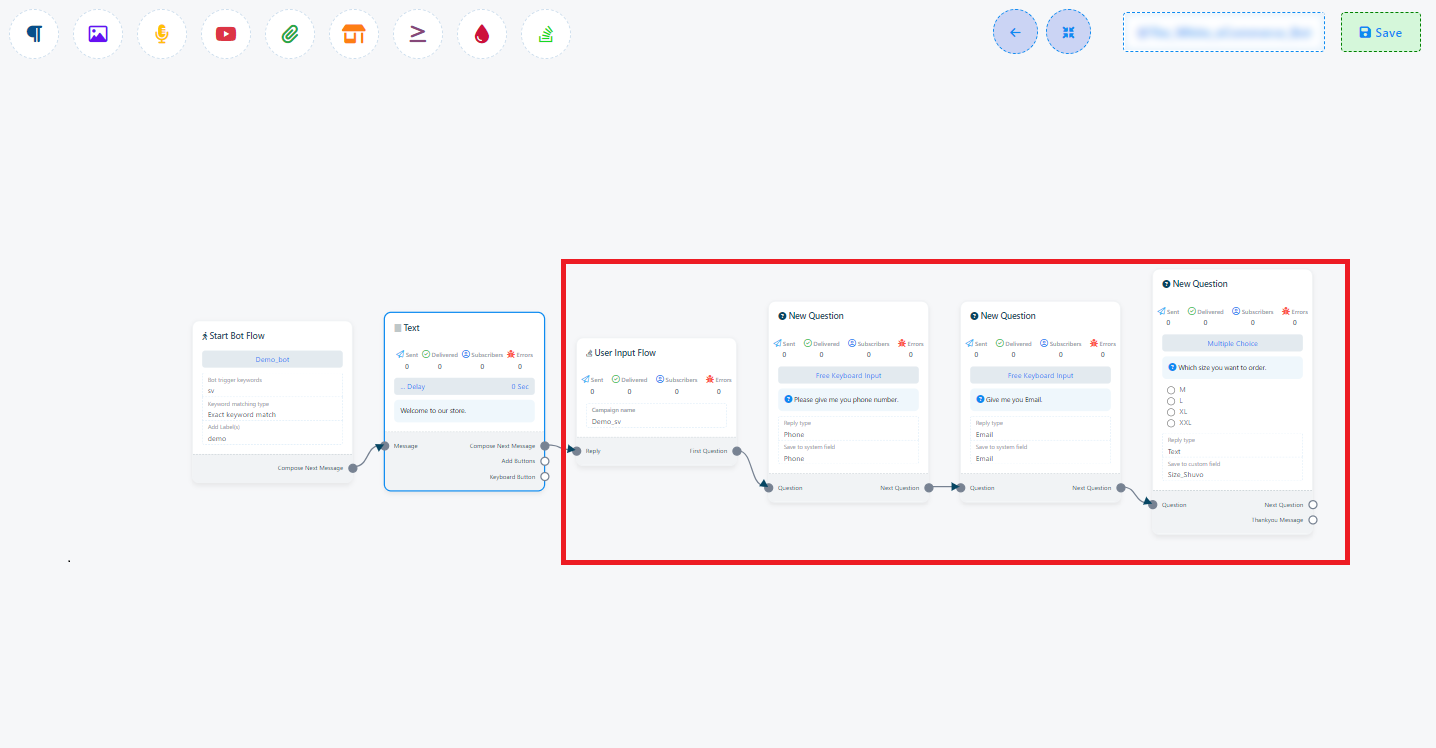
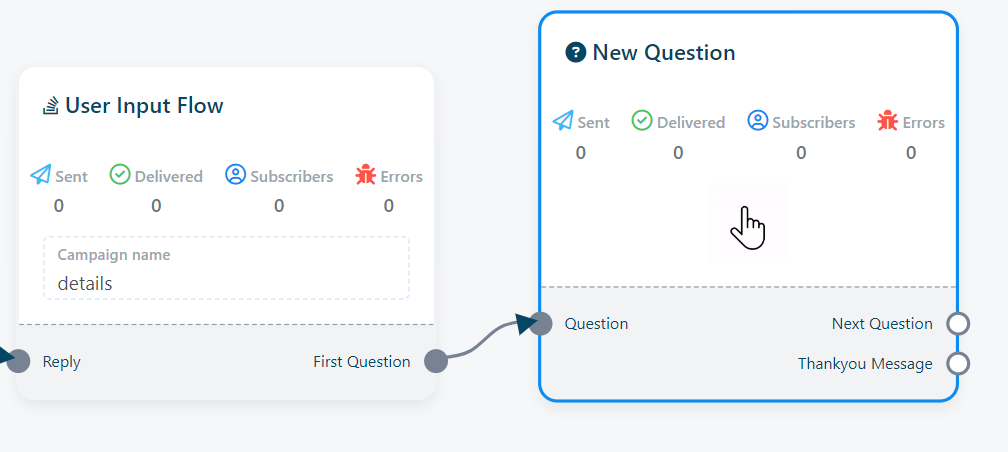
User Input Flow
The User Input Flow is a powerful feature that facilitates the collection of data from users through natural, conversational interactions. With this feature, you can create interactive flows to pose questions to users and store their responses in custom fields. This collected data can then be leveraged to personalize user experiences, segment subscribers, or export information to a CSV file.
To create a User Input Flow, you`ll first need to establish a User Input Flow campaign. This campaign serves as the container for the questions you want to ask users and the custom fields where their answers will be stored.
Once your User Input Flow campaign is in place, you can seamlessly integrate it into your bot`s flow. When a user encounters the User Input Flow component in your bot`s flow, they will be prompted with the questions defined in your campaign. Their responses will be automatically recorded in the specified custom fields.
User Input Flows offer versatile data collection capabilities. You can use them to gather a wide array of user information, such as names, email addresses, phone numbers, or user preferences for products and services, all through a natural conversational approach.
Configuring the User Input Flow involves the following steps:
- Start by dragging the `User Input Flow` component from the Top menu, or alternatively, select it from the socket menu. There are two options for adding this component to your flow.
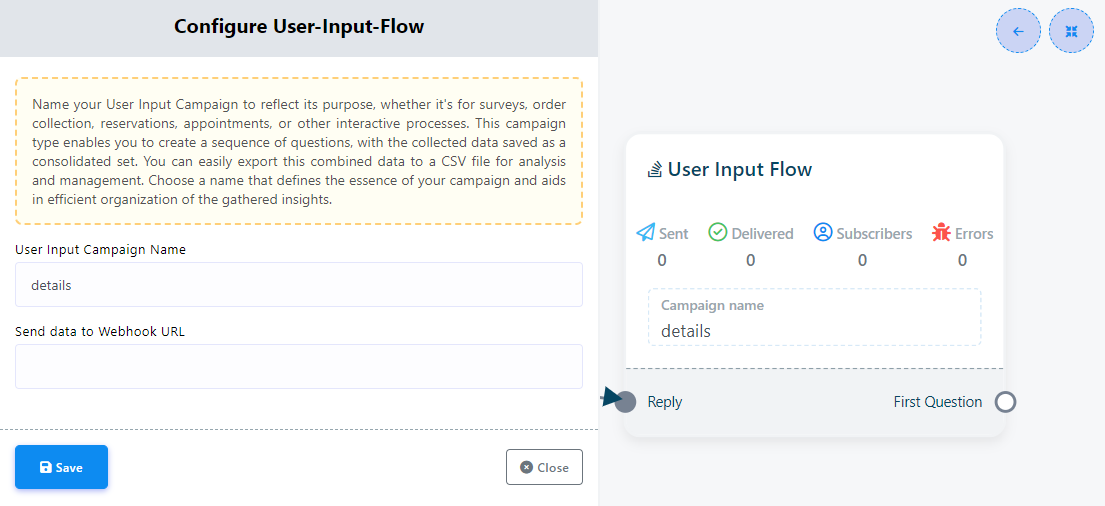
- Double-click on the `User Input Flow` component. In the pop-up window, you will find two fields:
- User Input Campaign Name: Enter a name for your campaign in this field.
- Send data to Webhook URL: If desired, you can save the input data to your Webhook.
- After saving the `User Input Flow`, a `New Question` component will automatically appear in the flow. Alternatively, you can drag the socket named `First question` and place it in your bot flow to reveal the `New Question` component.
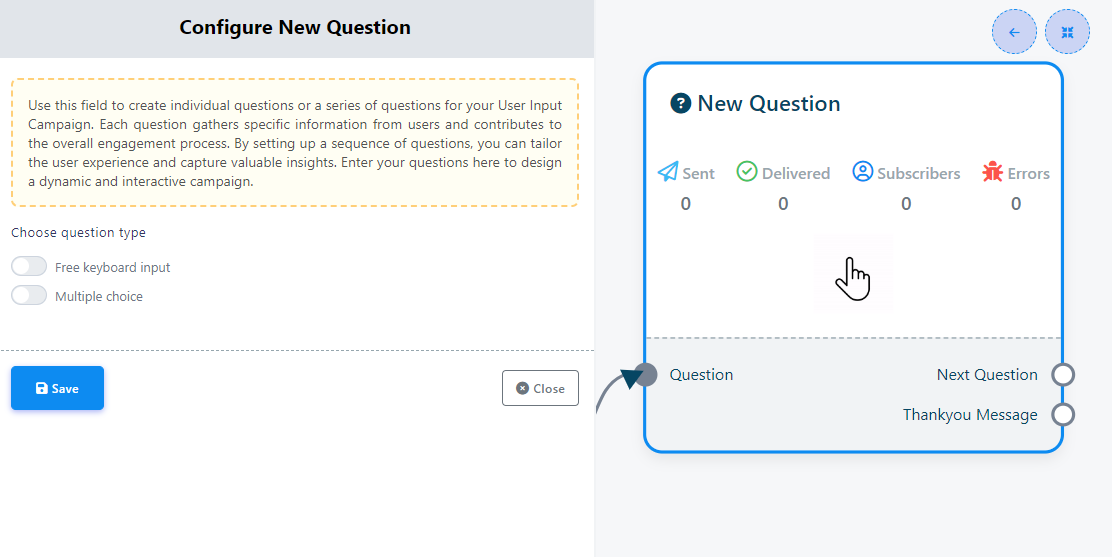
- Double-click on the `New Question` component to access two buttons: `Free Keyboard Input` and `Multiple choice`. These buttons determine the type of questions you want to ask.
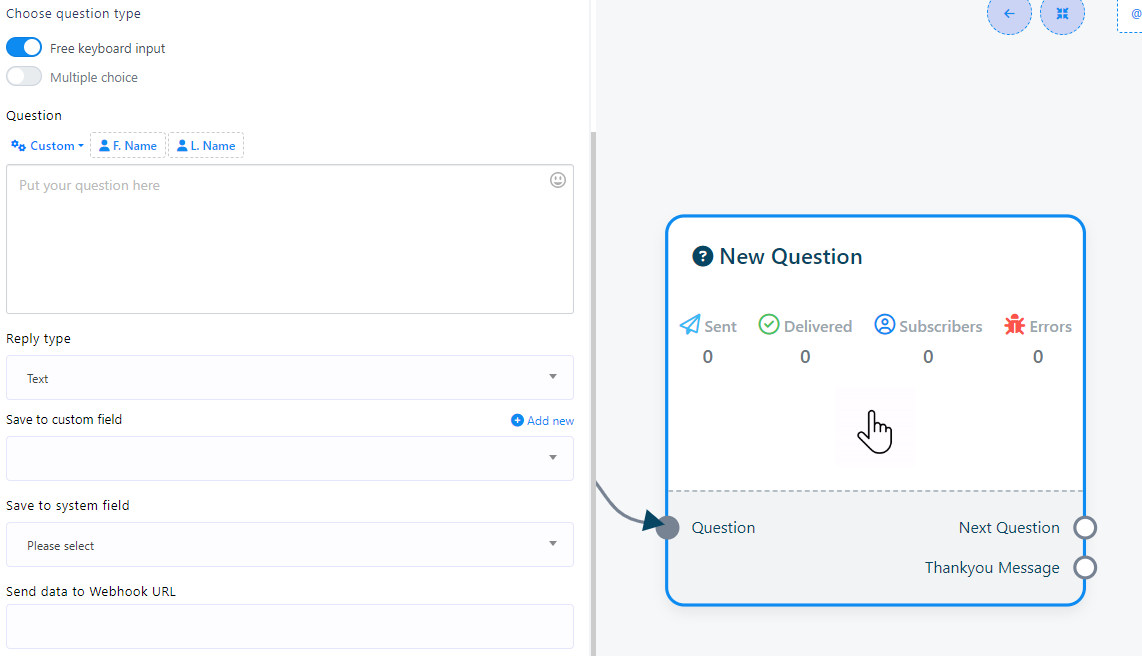
- Choosing `Free Keyboard Input` will present you with various options:
- Question field: This is where you can input your question
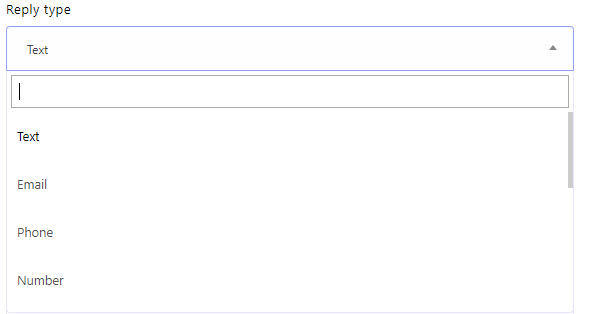
- Reply type: This field determines the type of responses allowed in your database.
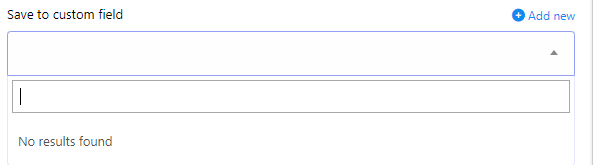
- Save to custom field: You can store the answer data in a specific data table that you specify. If you require a new custom field, you can create one by clicking the `Add New` button.
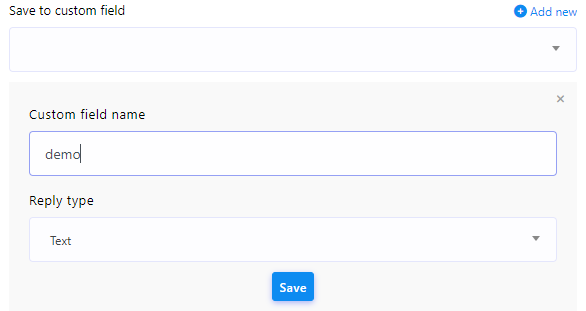
- Add New: To create a new custom field, click on `Add New`. You`ll be prompted to provide a name in the `Custom Field Name` field, set the `Reply Type`, and click `Save`. This will create a new custom field.
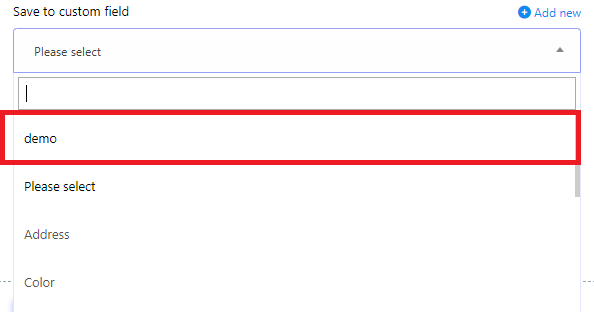
- Use Added new Custom field: Once you`ve created a new custom field, you can select it from the `Save to Custom Field` pop-up menu.
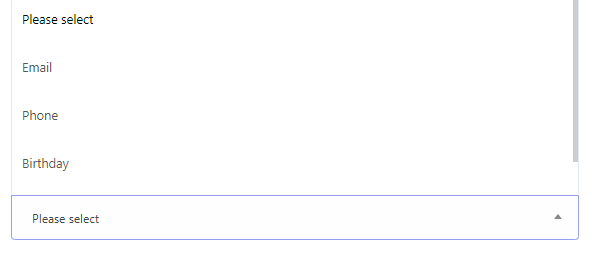
- Save to system field: In the system, there are pre-existing data tables that you can utilize without creating new ones. Simply click on the `Save to System Field` pop -up menu and choose the data table you wish to use.
- Send data to Webhook URL: To send bot data to a specific URL, add your webhook link. This feature simplifies data storage through webhook integration
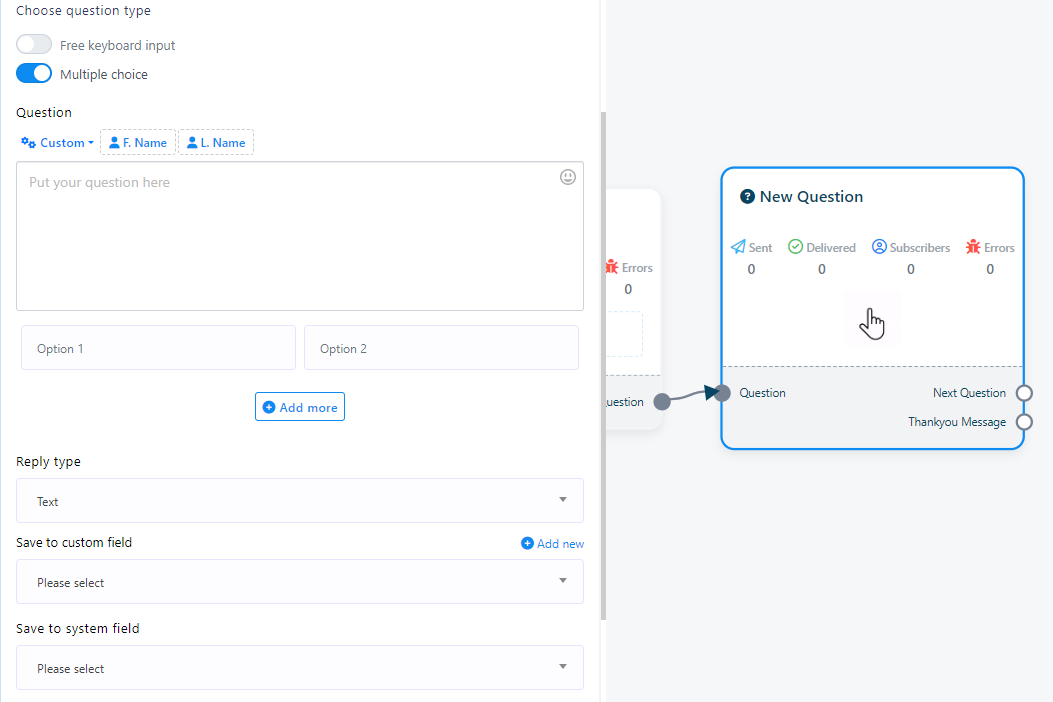
- Opt for `Multiple Choice`, and a new set of fields will become available for configuration:
- Question field: Use this field to craft the question you want to pose to the user.
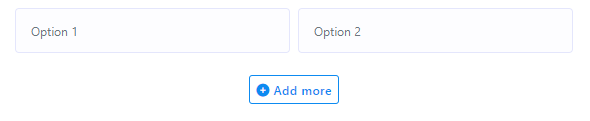
- Option: In this section, you can provide predefined answers. Users can select one of these predetermined options. To include multiple options, simply click on `Add more`.
- Reply type: Employ this field to specify the type of answer you anticipate and intend to store in your database.
- Save to custom field: You have the option to store the answer data in a specific data table that you specify. If you require a new custom field, it can be created by clicking the `Add New` button.
- Add New: This feature allows you to establish a fresh custom field. By selecting `Add New`, you`ll be prompted to enter a name in the `Custom Field Name` field, set the `Reply Type`, and then click `Save` to generate a new custom field.
- Use Added new Custom field: After creating a new custom field, you can choose it from the `Save to Custom Field` pop-up menu.
- Save to system field: Within the system, predefined data tables are available for use, eliminating the need to create new ones. Simply access the `Save to System Field` pop-up menu and designate the data table you want to employ.
- Send data to Webhook URL: To transmit bot data to a designated URL, input your webhook link. This feature streamlines data storage through webhook integration.
Free Keyboard Input: In this button user can answer the question by using open keyboard.
Multiple choice: In this button user get pre-written answers. Just your customer need to select a pre-set answers.
Here are the details for configuring the `New Question` component:

Multiple choice