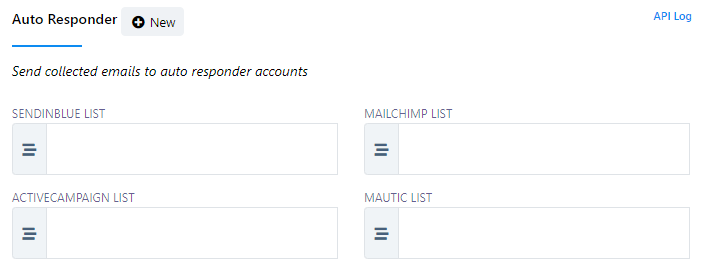
Telegram Bot Configuration
To configure settings, follow these steps:
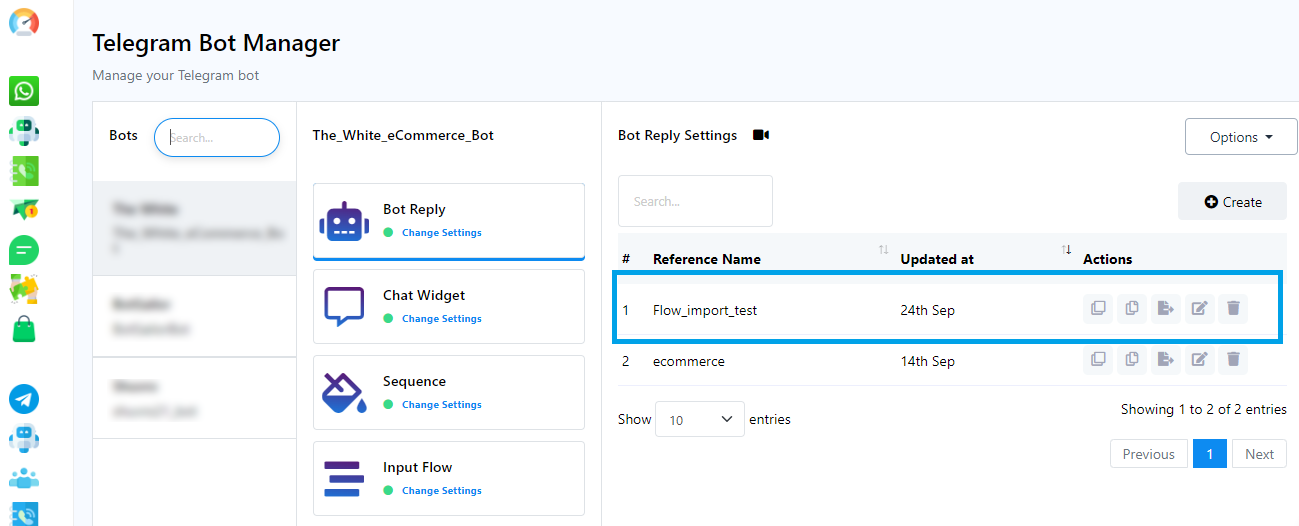
Start by navigating to the Bot Manager Page from the Dashboard. Click on the `Configuration` option.

General Configuration
Chat with Human Email: In the `Chat with Human Email` field, you must provide an email address. When a subscriber clicks on the `Chat with Human` button, an automatic email will be dispatched to the email address you`ve specified. This means that you will receive notifications via the provided email address when a subscriber wants to initiate a conversation with a human agent.
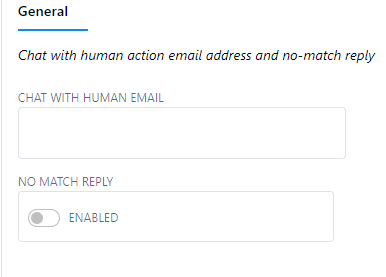
No Match Reply: Within the `No Match Reply` field, you will find a radio button. Users can choose to enable or disable this radio button. When the radio button is enabled, the `No Match Reply` template will be sent if no keywords match the user`s input. Conversely, when the radio button is disabled, no response will be generated when there is no match for the user`s input.
The no match reply response frequency limit for a bot account is the maximum number of times that the chatbot can respond with a `No Match Template` response. In this case, if the `Every Time` toggle button is on, then the chatbot will send the `No Match template` every time it can’t identify the proper response. In the other case, if the `Once a day` toggle button is selected, then the chatbot will send the `No Match template` only once a day if it can’t match any bot replies.
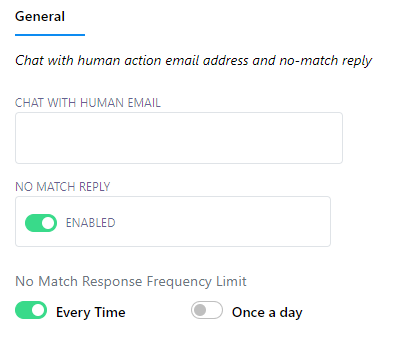
Auto Responder Configuration
Under the `Auto Responder` section, you will encounter several fields, including:
- Mailchimp List
- Sendinblue List
- Activecampaign List
- Mautic List
- Acelle List
To configure these fields, follow these steps:
In the `Integration` section, if you`ve already created auto responder profiles for different providers, you can choose the appropriate auto responder account.
Once you`ve selected the auto responder account, any email addresses collected through the bot will be automatically included in the corresponding account.
Within this section, you`ll find various fields for configuring specific lists, including `Mailchimp List`, `Sendinblue List`, `Activecampaign List`, `Mautic List`, and `Acelle List`. These fields allow you to define where the collected email addresses should be stored based on your chosen auto responder service.
Configuring Auto Responder Integration
When users interact with the bot and provide their email addresses, there`s no need for manual transfers or exports. The collected email addresses will be seamlessly integrated into the selected auto responder service you`ve configured.
To set up auto responder integration, follow these steps:
Fill out the necessary fields with the relevant information. This typically involves specifying the specific lists or accounts within your chosen email marketing or auto responder platforms that you wish to connect to.
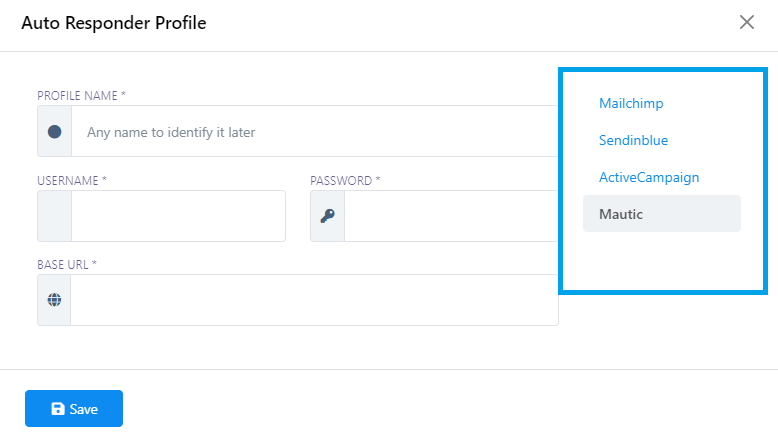
If You Haven`t Created an Auto Responder Profile in the Integration Section:
- Click the `New` button located next to `Auto Responder`.
- Next, click the `New` button next to `Auto Responder Profile`.
- Select the auto responder service you want to use.
- Complete the required input fields.
- Click `Save` to create your user profile.


Email integration
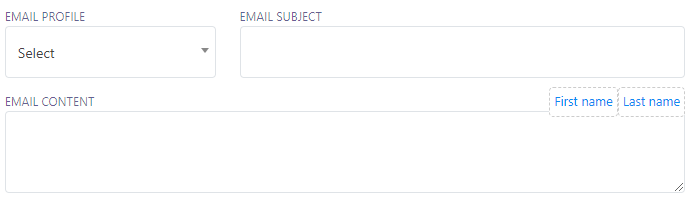
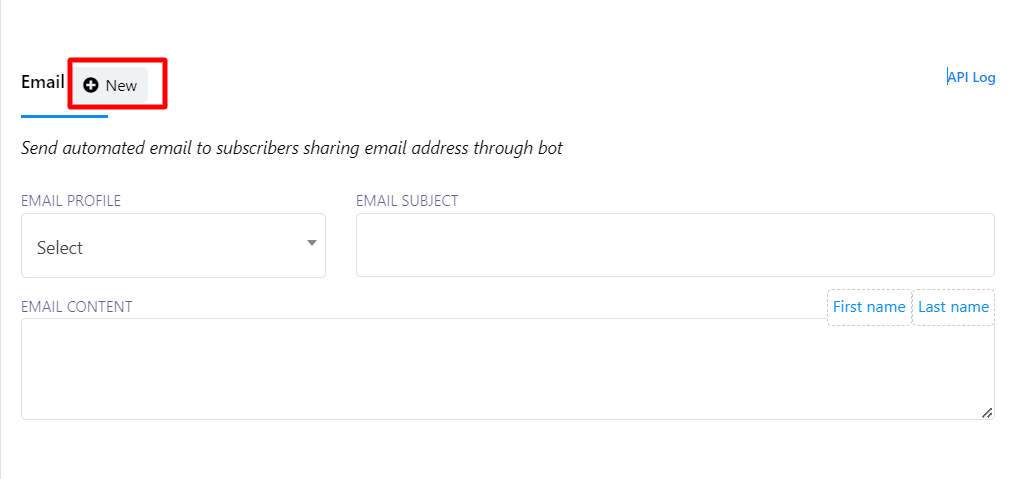
In the Email Integration section, you have the option to configure a default email sender. This default email sender will automatically send emails to the addresses collected through the bot`s interactions. To set this up, you need to choose an Email Profile that have been previously created in the Integration section. These Email Profiles can be various Email sending providers like SMTP, Mailgun, Postmark, SES, and Mandrill.
Once you`ve chosen an Email Profile, you can proceed to create an email by specifying the Email Subject and Email Content. Follow these steps:
- Scroll down to locate the `Email Integration` section within the configuration.
- In this section, you`ll find an Email Profile dropdown menu. Click on it to select an existing profile from the available options. [Email profile menu].
- Fill in the Email Subject and Email Content input fields with your desired email details.
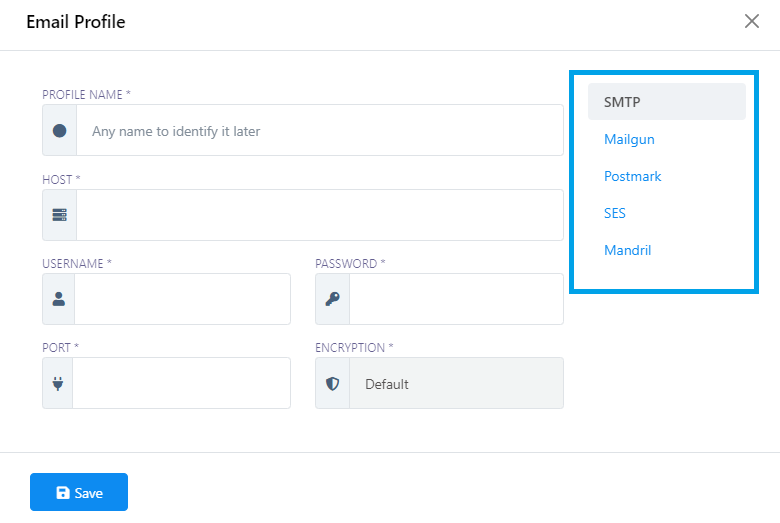
Creating a New Email Profile (If haven’t been created yet):
If you haven`t created an Email Profile yet, follow these steps:
- Click on the `New` button.
- Select Sender: Choose your desired sender from the options provided.
- Complete Input Fields: Fill out all the required input fields with the necessary information.
- Save Profile: Once you`ve filled in the details, click the `Save` button to create the new Email Profile.

By following this process, you can streamline and automate your email communication with the email addresses collected through your bot. Simply select an Email Profile that specifies the email sending method (e.g., SMTP, Mailgun), and then craft your email content by defining the subject and message. This approach eliminates the need for manual email management, enabling you to efficiently reach your audience.
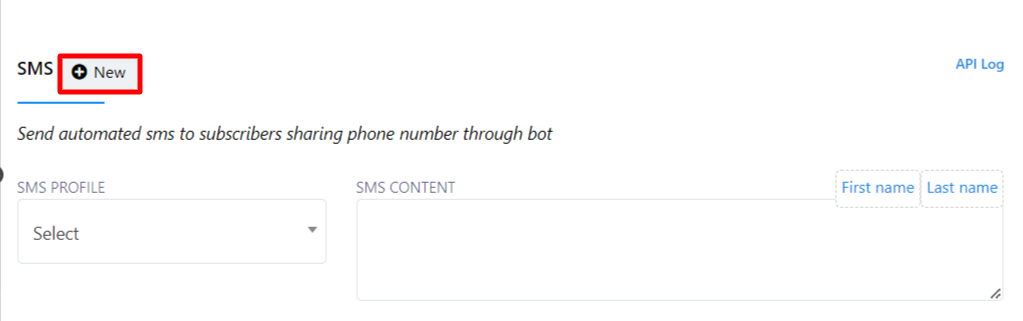
SMS integration
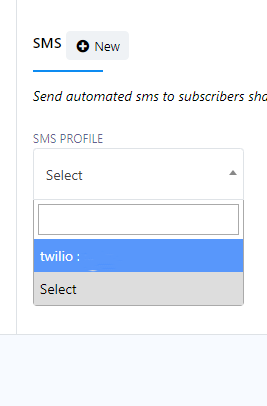
Within the SMS integration section, users have the option to configure a default SMS message. This default SMS will be automatically sent to the phone number collected through interactions with the bot. To set up SMS integration, users need to select an SMS profile they have previously created in the Integration section. These SMS profiles can be linked to various SMS sending providers, including Plivo, Twilio, Nexmo/Vonage, Clickatell, and Africastalking.
Setting Up SMS Integration:
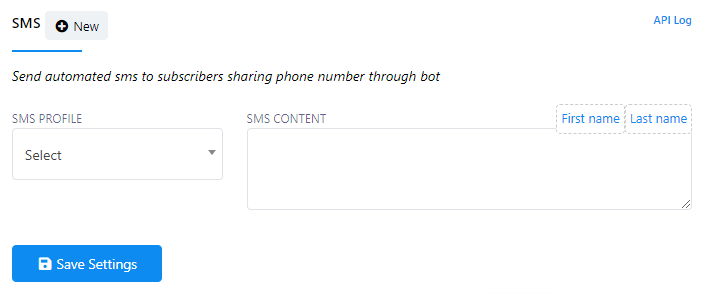
- Begin by selecting an existing SMS Profile from the drop-down menu.
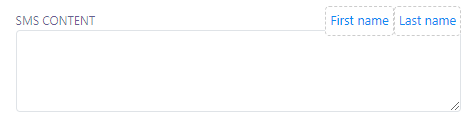
- Compose the content of your SMS message. Note that you can also use a subscriber`s First Name and Last Name from the SMS Content field in your message.
- Save your configuration to send automated messages.
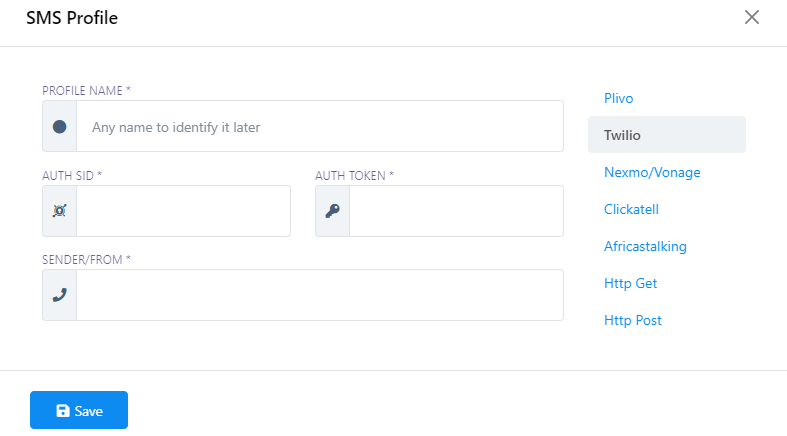
Creating a New SMS Profile (If haven’t been created yet):
To create a new SMS Profile, follow these steps:
- Click the `New` button next to the SMS section. This will take you to the SMS integration.
- Then, click the `New` button beside the SMS Profile.
- Choose an SMS sender.
- Fill out all the required input fields with the necessary information.
- Save your settings, and your new SMS Profile will be created.

Additional Options:
Options Button: Located at the top right of the form, the `Options` button provides access to advanced settings and options.
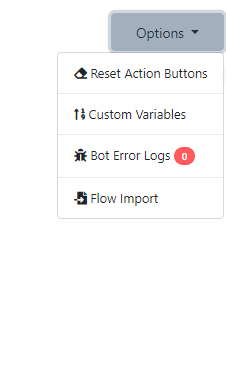
Reset Action Button: You can use the `Reset Action` button to delete or reset all of your configured action buttons.
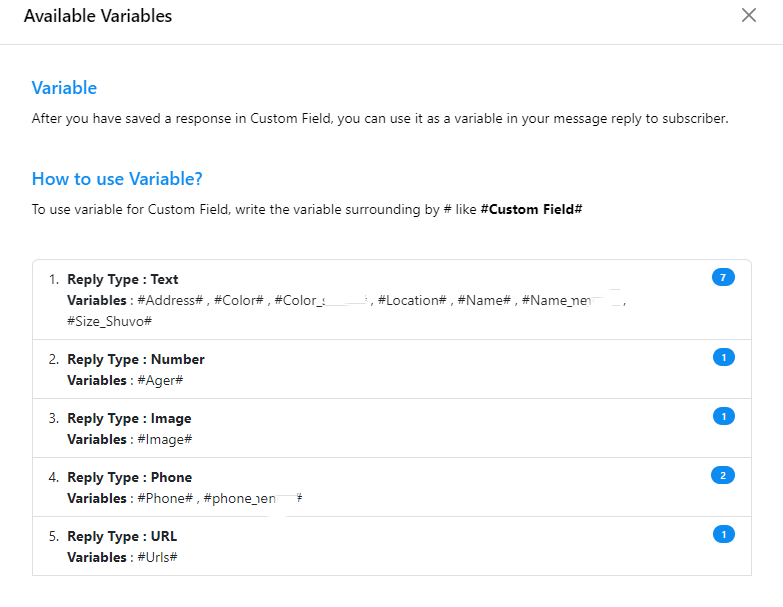
Custom Variables: Within the `Options` menu, you`ll find instructions on how to use custom variables and a list of available custom variables for your convenience.
Bot Error Log:
Also, user can see the Bot Error logs from the option button.
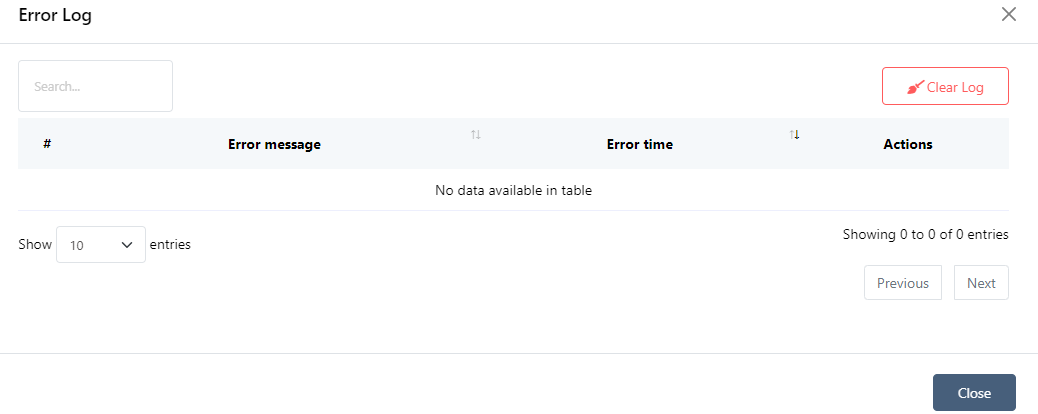
You can access the Bot Error logs from the `Options` button. To clear all error logs, simply click the `Clear Log` button.
Flow Export: Flow Export is a process that involves creating a bot flow using a flow builder and saving it in a `.txt` format. This allows for easy sharing and storage of the bot`s flow structure in a text-based format.
To export a flow, follow these steps within the Telegram Bot Manager:
- Start by creating a bot flow using the flow builder.
- Save the bot flow and return to the Telegram Bot Manager.
- In the user bot action section, select the third option for exporting. After choosing the export option, your bot will be saved in .txt format.

After selecting the export option, user bot will be saved in.txt format.
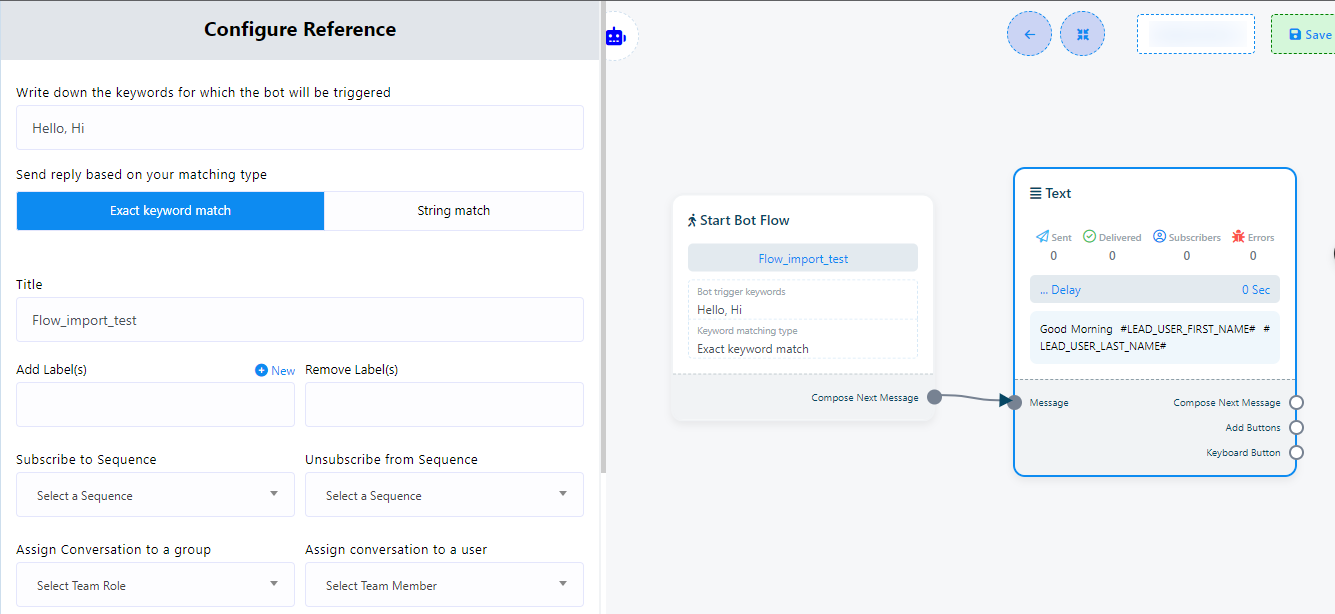
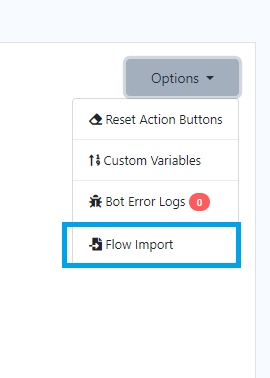
Flow Import: Flow Import, is the counterpart process to Flow Export. It involves taking a previously saved or externally created bot flow, often in a `.txt` and importing it into bot flow builder. This allows users to quickly integrate pre-defined conversational flows, bot structures into their projects without the need to recreate them manually. Flow Import simplifies the setup and configuration of chatbots by incorporating pre-existing bot flows.
To import a flow, follow these steps within the Telegram Bot Manager:
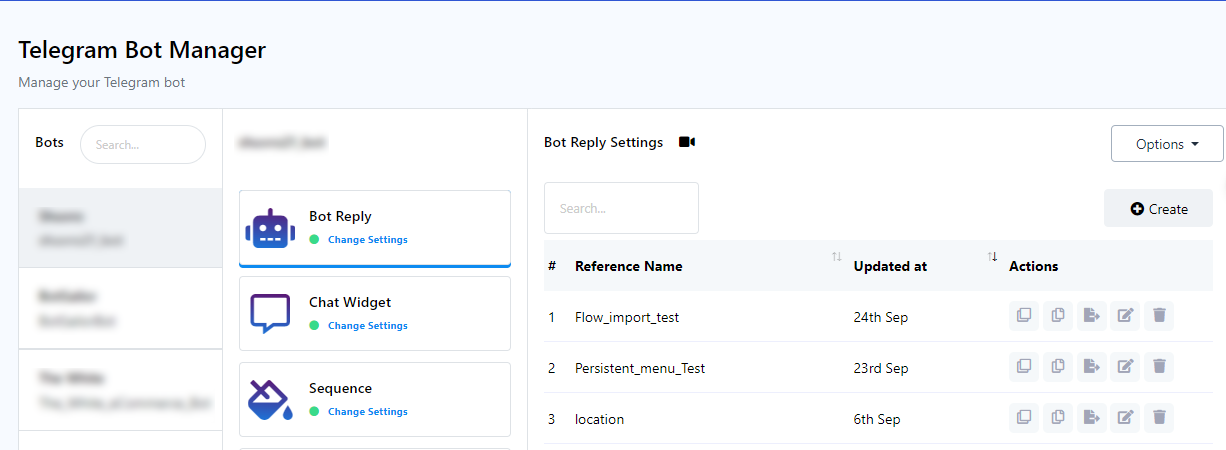
- Start by selecting the bot where you want to import your user bot.
- Navigate to the Configure section and click on `Flow Import` from the Options drop-down menu.
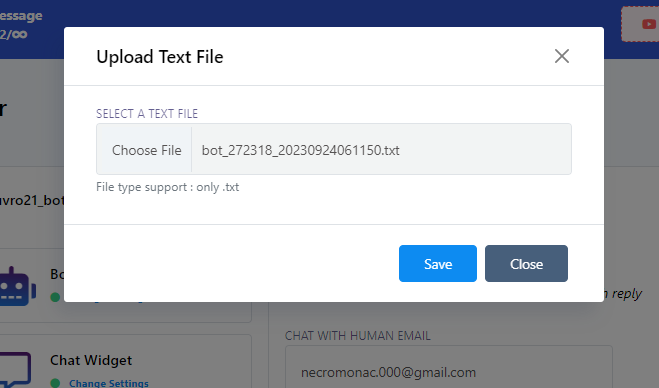
- Upload a bot.txt file using the provided upload bar.

After the import, check the Bot Reply section of the selected bot within your Telegram Bot Manager. Your user bot list will be updated accordingly.